Over the last two years or so I’ve been steadily working on improving my drum painting technique. I found the best brands of paint and lacquer, built a turntable and worked on improving my spraying hand.
I’d gotten decent at achieving a smooth result for a single color, and was reaching the limits of what I could do with solid black or white paint jobs. I pride myself on era-correct refurbs and classic looks whenever possible, so I wanted to be able to do faded two town paint jobs (often referred to as “Duco,” that term actually refers to the DuPont Corporation paint that was used).
I’d tried to free hand these paint jobs in the past and the result was not so good. But recently a friend mentioned a method for getting a nice fade in a two tone paint job and I adapted what he described to my own purposes. It’s fairly primitive, just a series of two cardboard fences suspended around drum heads to block the edges of a drum and leave a clear stripe in the center. I’ve made quite a few of these fences at this point, and have begun saving all my junk drum heads to aid in this painting.
The top fence is held in place with thumbtacks, and adjusted as needed. I flip the shell to make sure the stripe is symmetrical.
The result with these fences was instantly better than I had dreamed. They take a lot of preparation and care to line up correctly but it’s worth it. Here is a Radio King set that was one of my first two tone paint jobs (the ancient gold sparkle inlays really made this project):
Radio King two-tone refinish paint job
Drum wrap is expensive, and though I’ll still use it for other kits I now feel I’ve advanced enough in painting to do justice to high quality kits like this. And the cost is a fraction of what wrap would be for a 26/13/16/7×14 drum set!
p.s. these red and gold Radio Kings are now sold, sorry…
I’m not a collector, never thought of myself that way. I’m a drummer who likes to work on and fix drums, and most everything I have is for sale. Often as soon as I finish restoring it!
Sometimes though, I acquire a drum so nice though that I don’t know what to do with it so I just sit on it for a while and enjoy looking at it. These are two such drums that I’m now selling.
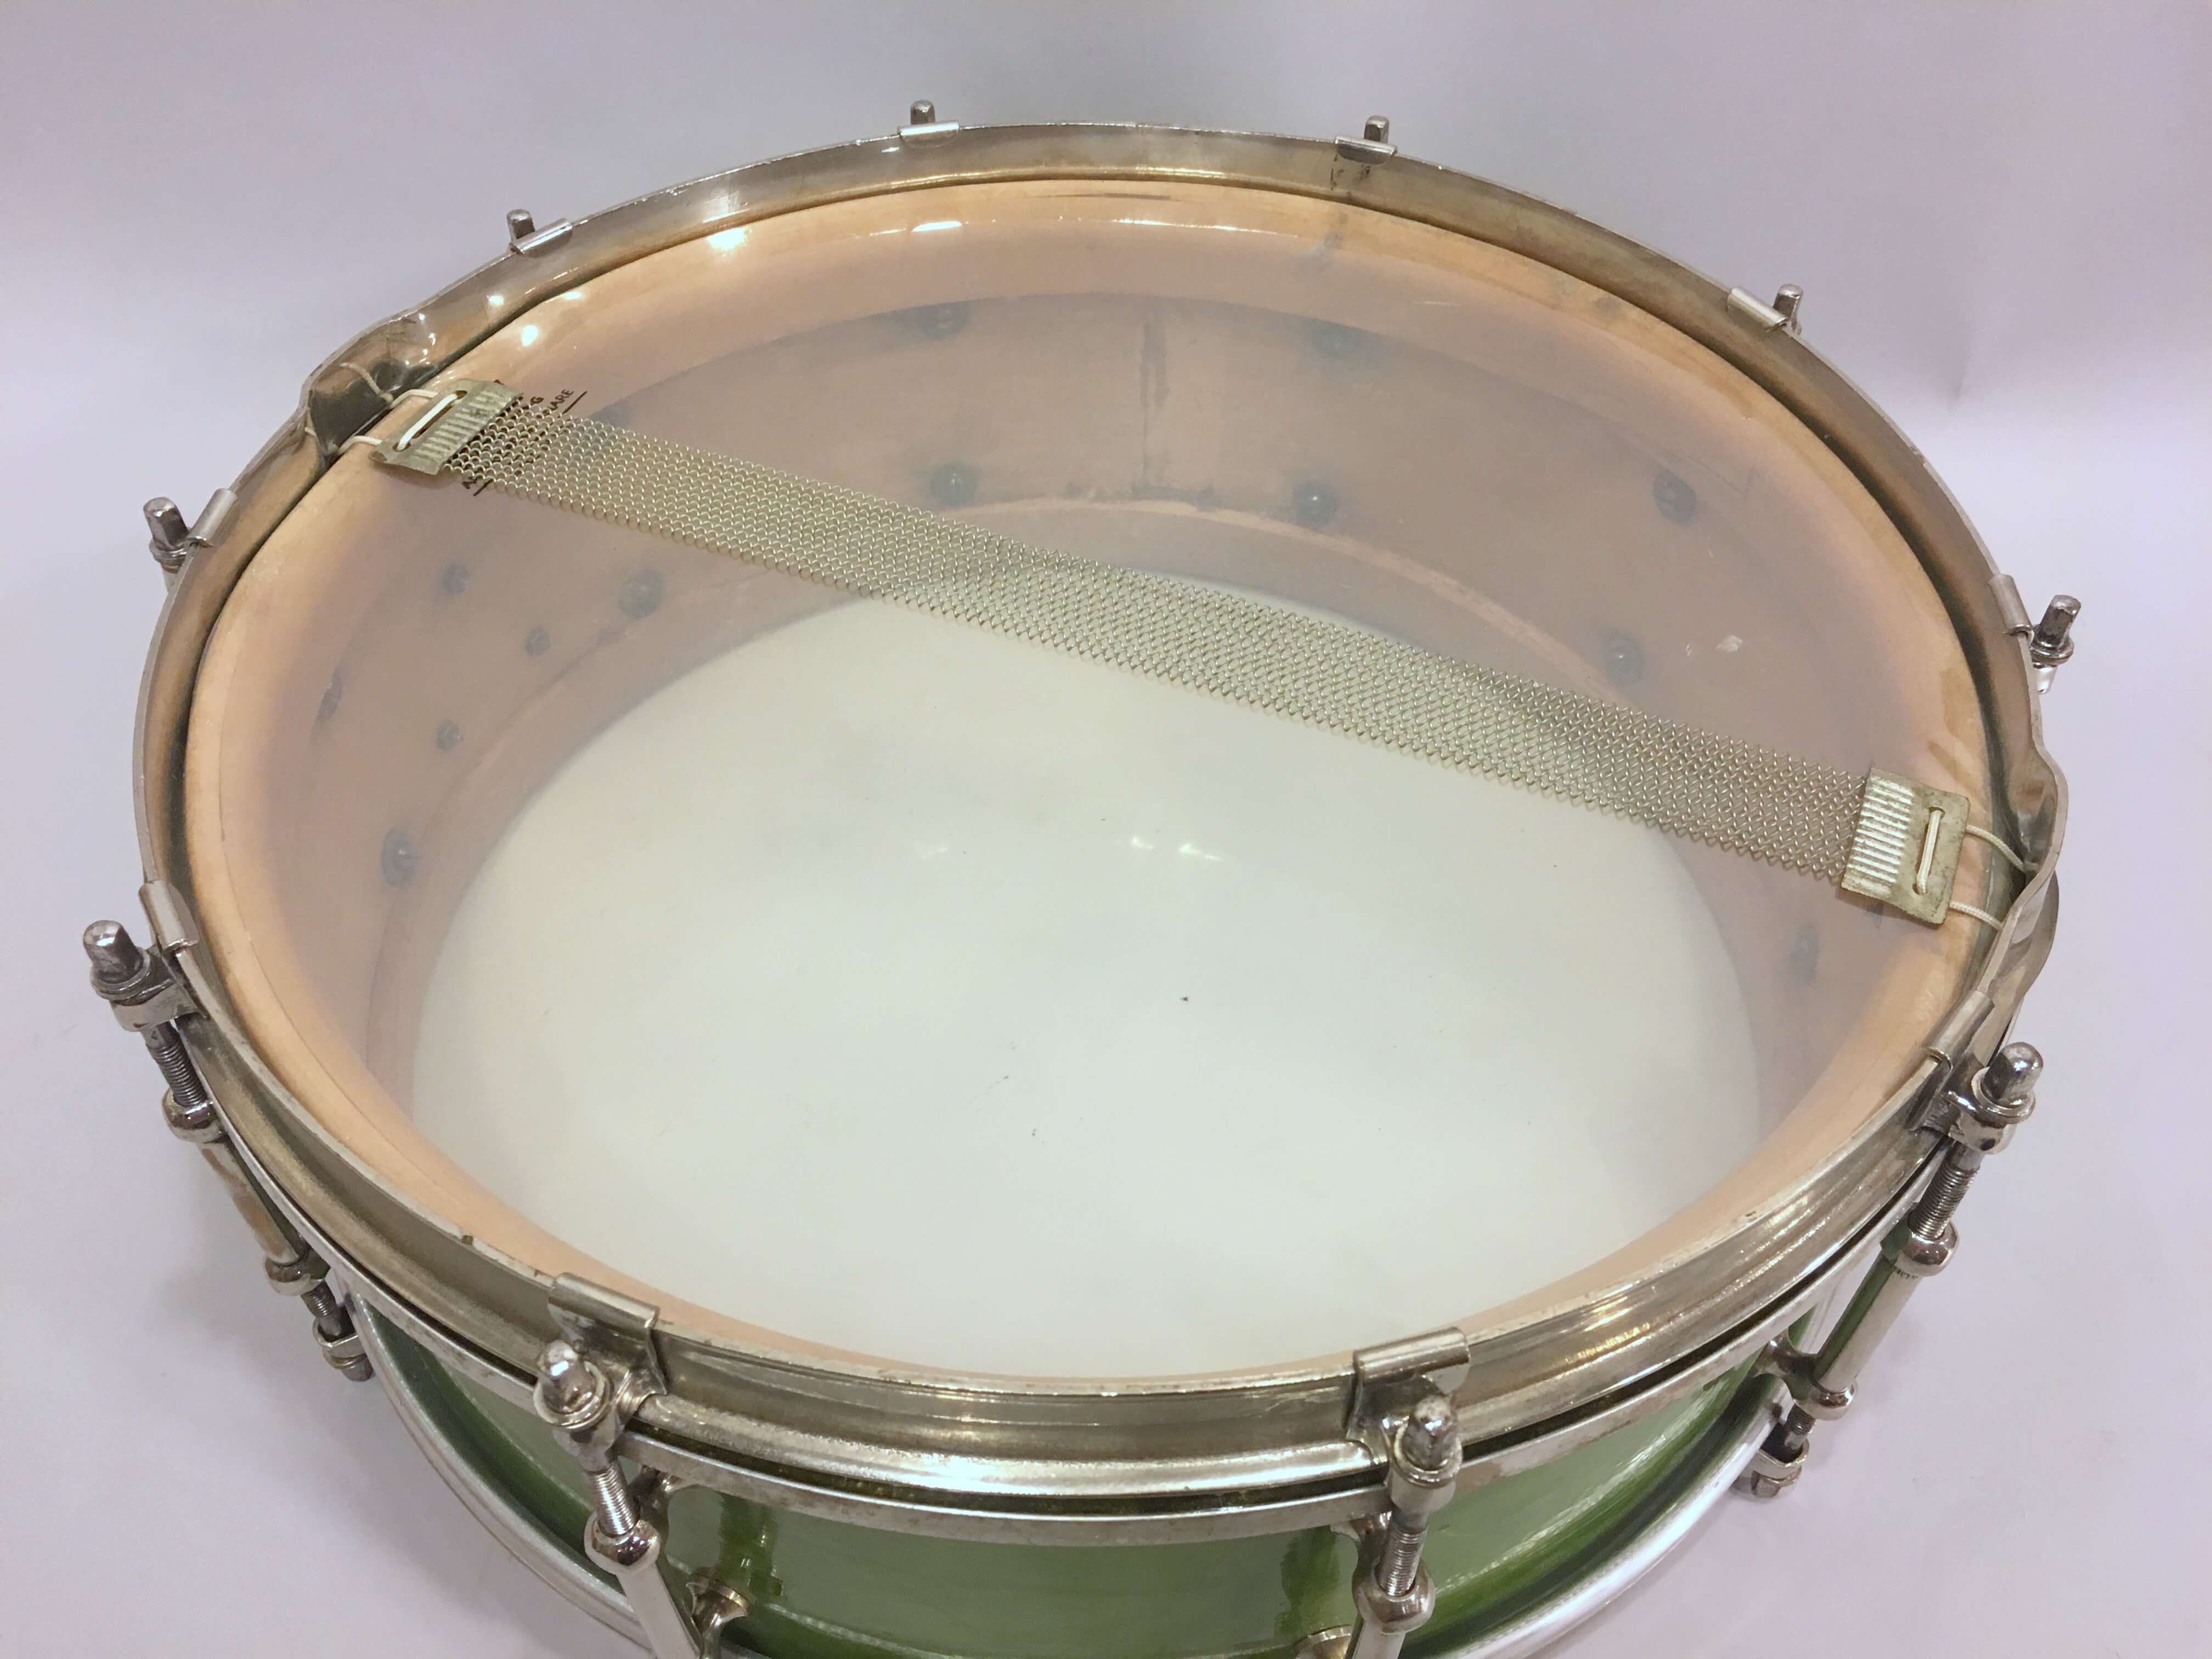
Carlton Greenwood Pearl 30s 5×14 Snare
Carlton 30s Vintage Solid Birch Snare Drum
This snare is very similar to the Slingerland Artist snares of the same era, and in fact it’s easy to mistake it for such at first. 10 tube lugs, solid birch shell, 3-point strainer, single flanged rims and clips. But Carlton of course never used a tone flange, so this drum has bearing edges top and bottom.
At first glance it appears to be the famed Sea Green Pearl available on Slingerland and other US brands. Carlton called the wrap on this drum Greenwood Pearl, after a British drummer who was assumedly an endorser. It’s a shade or two darker than its American cousin.
No extra holes, no damage to speak of on this snare drum and it’s all original. The strainer arm and nut are long gone. I put a brass replacement nut on the post to make it easier to use. It works smoothly without the arm, in fact it’s unusually smooth for an 80-year-old 3-point throw.
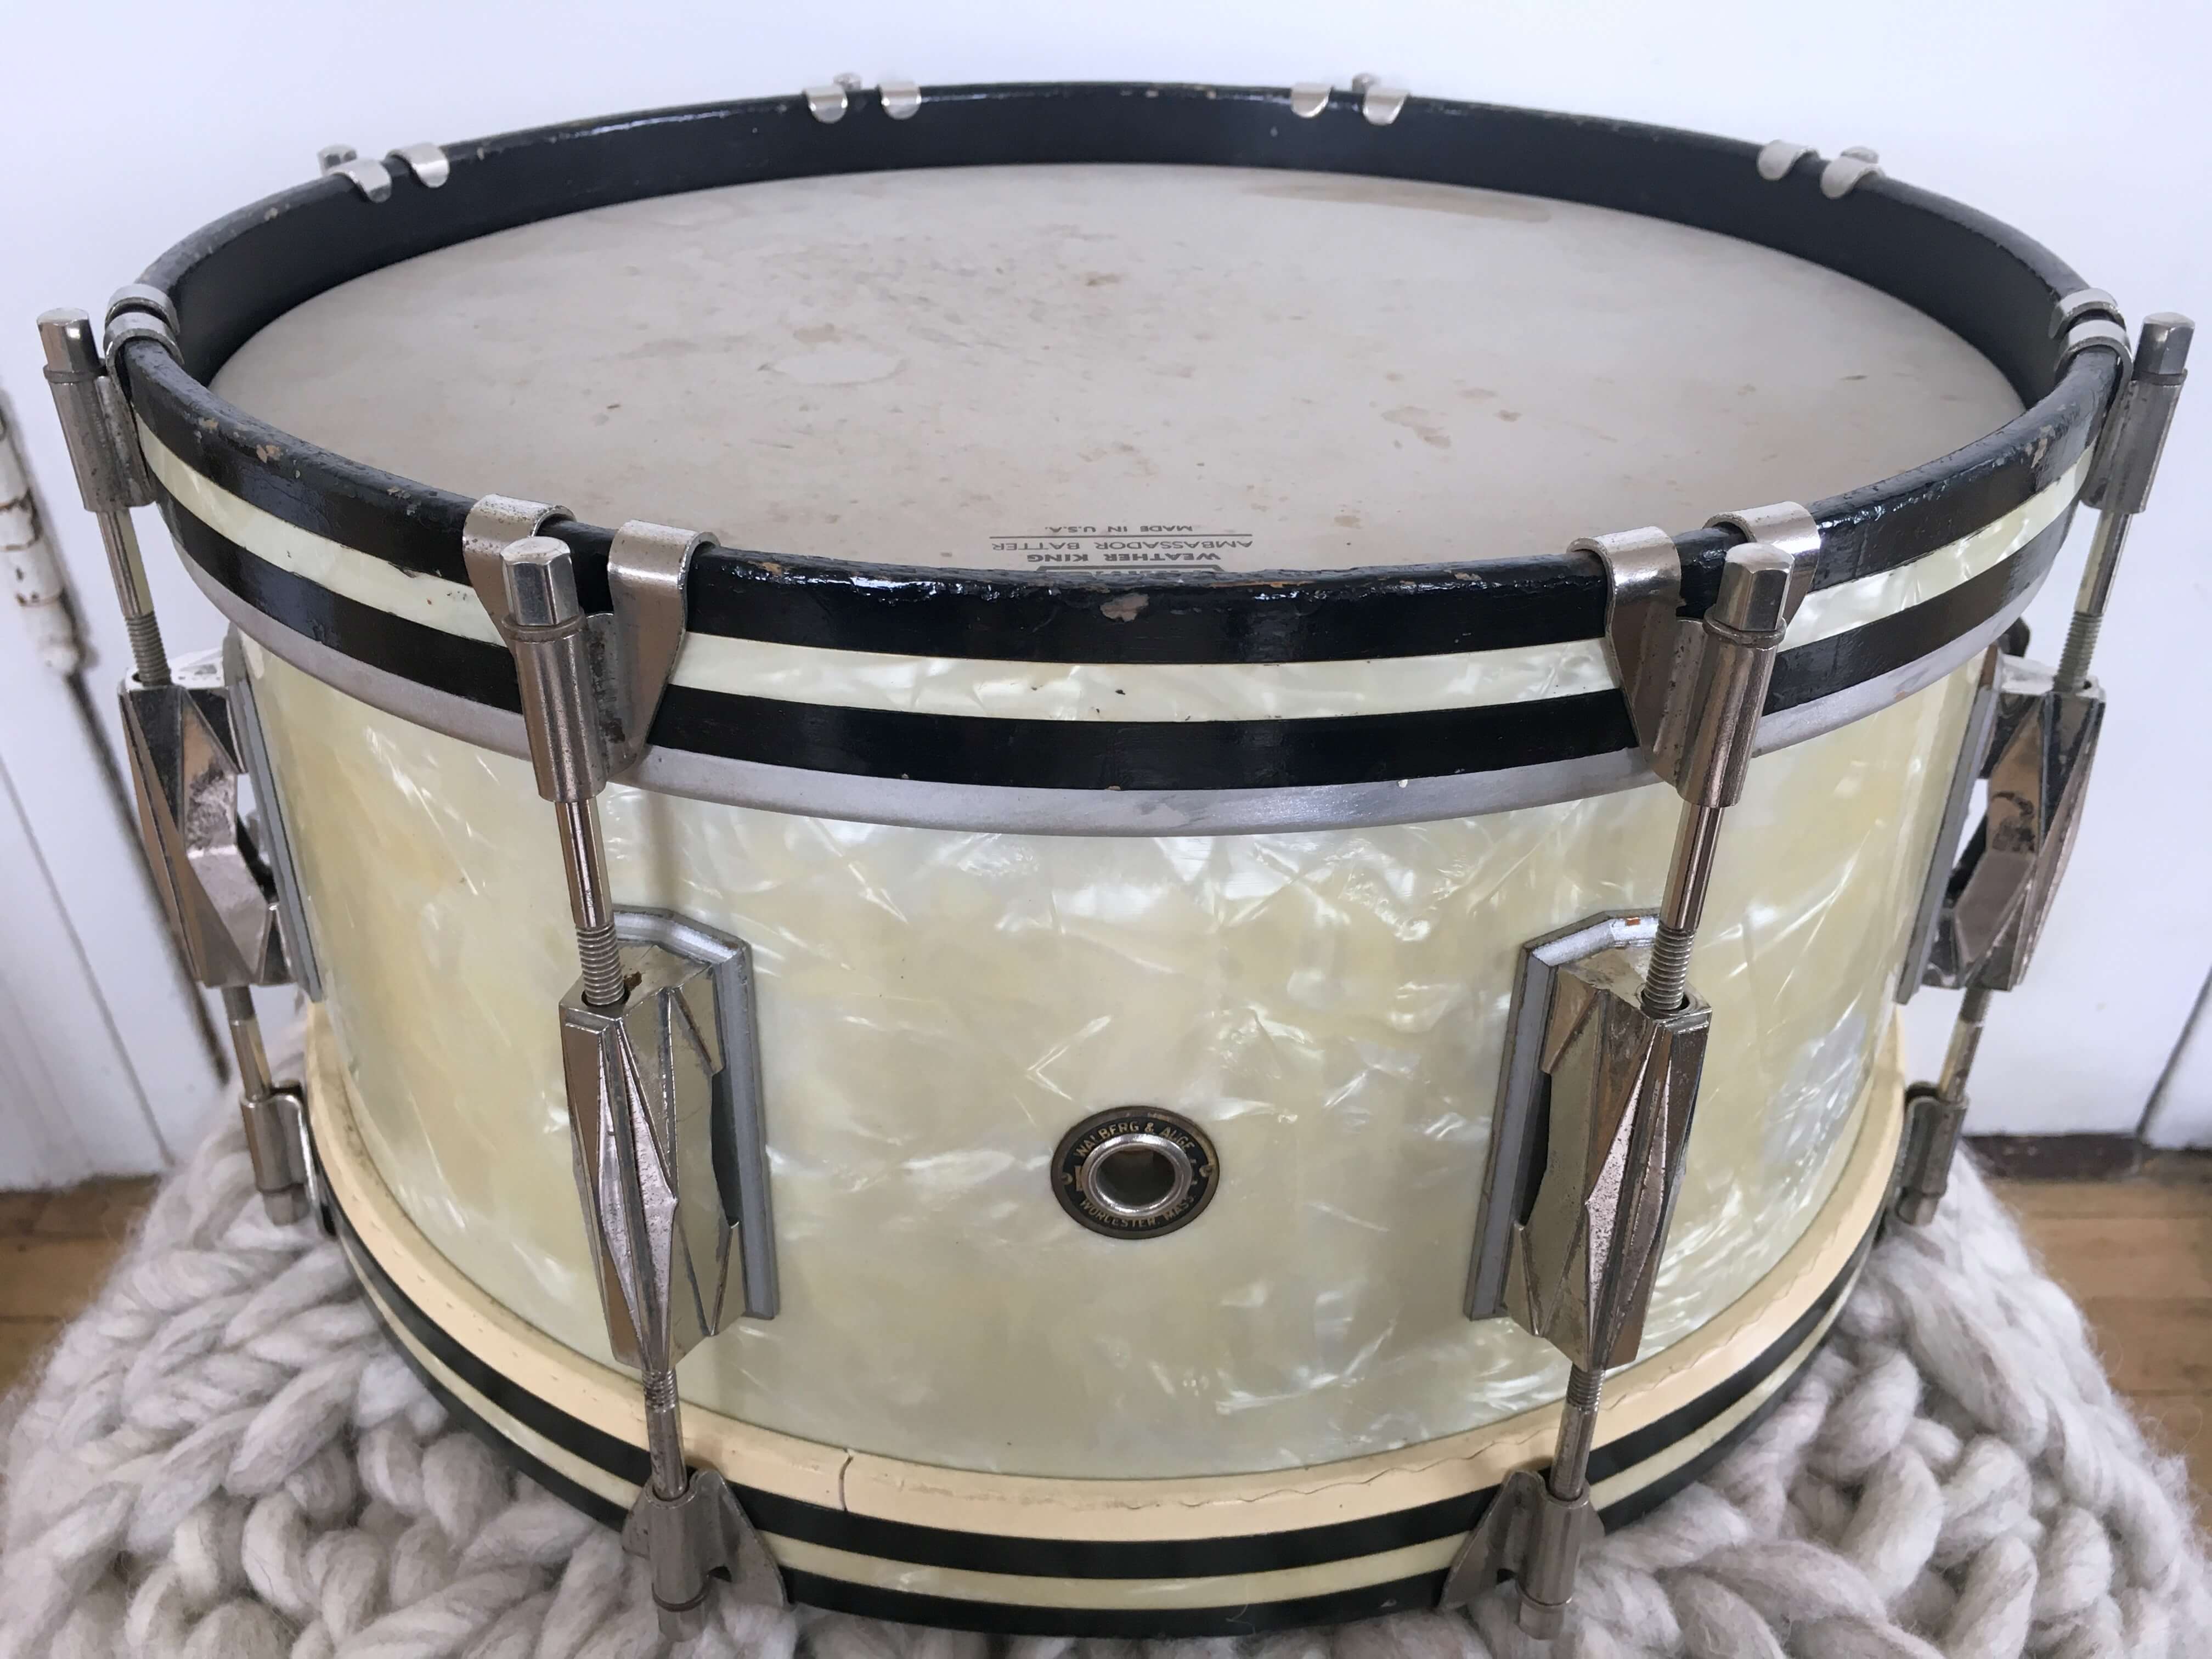
Walberg & Auge supplied the majority of the hardware and moving parts to US drum makers for decades, far more than most people realize. They sometimes made drums in their factory as well. The story as I’ve heard it is that they would take parts in trade for orders occasionally, lug casings for instance. I don’t know if the drums they produced were special orders. Maybe it was their employees using the tooling to produce whatever they could dream of.
In any case, this snare drum is one of a kind as most W&A drums were. 6.5 by 14 6-ply shell, wooden hoops, Gretsch “rocket” lugs, W&A strainer, butt plate, claws and hex rods.
Walberg & Auge 40s Snare Drum
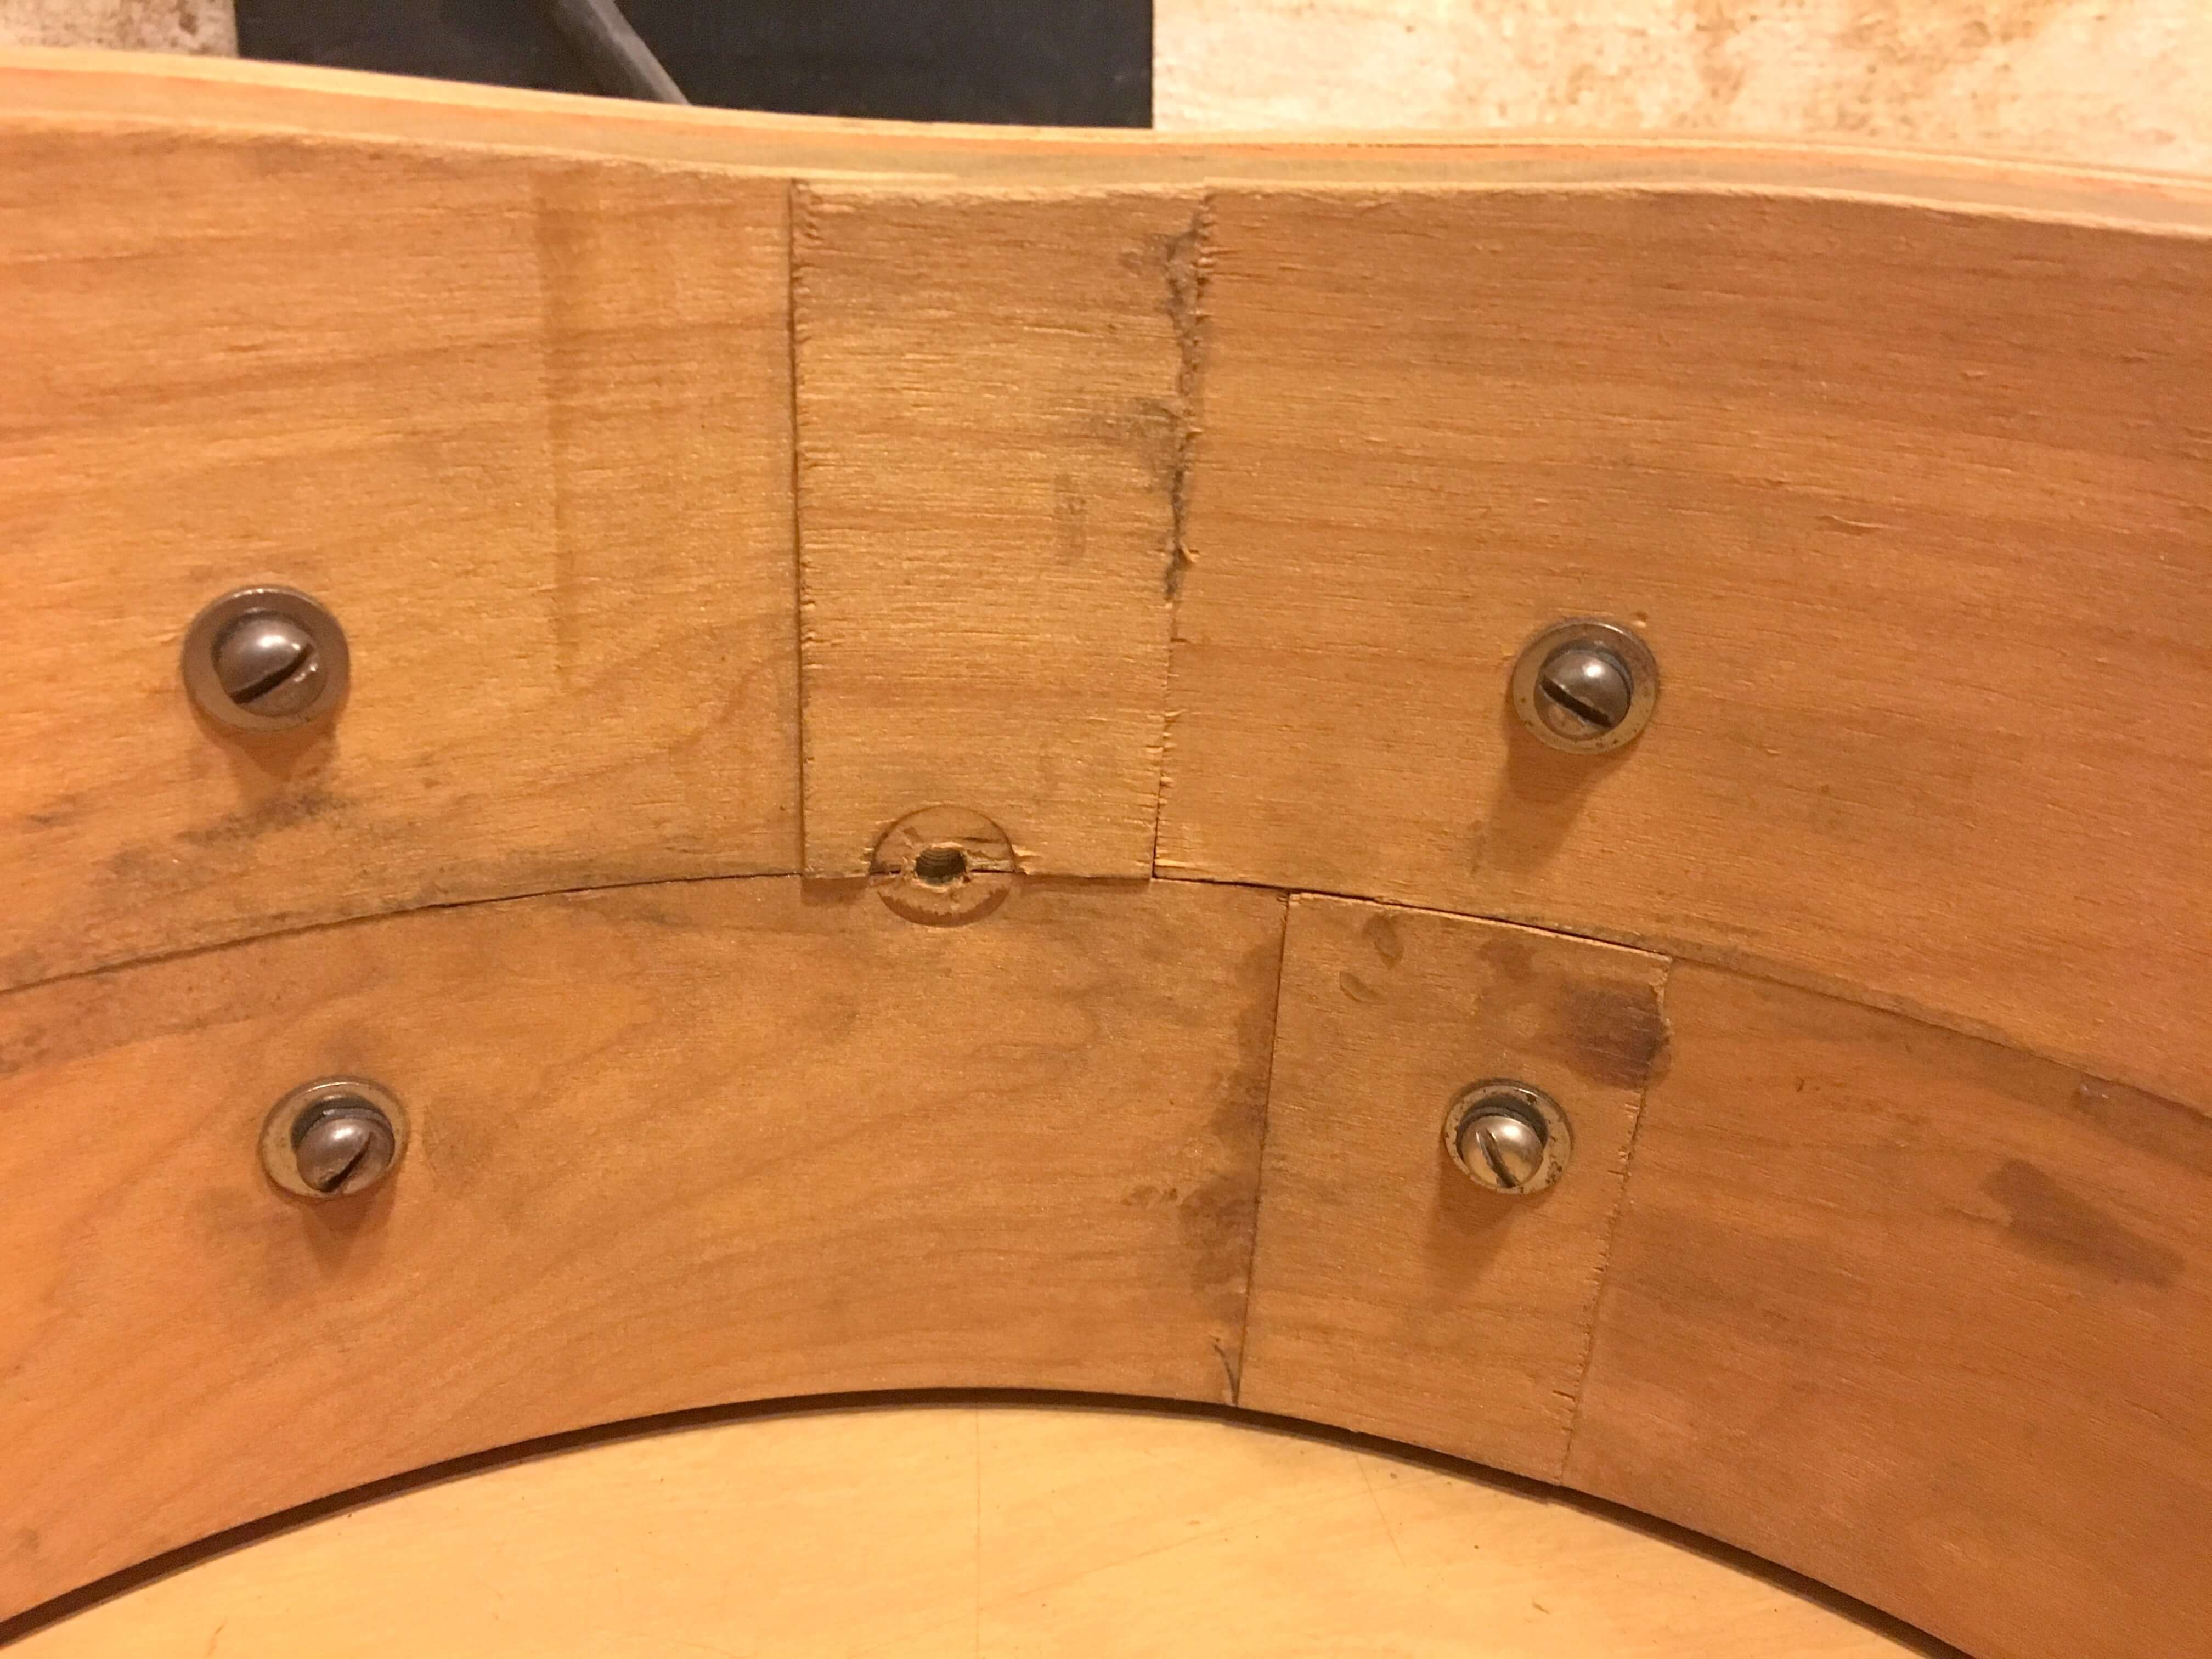
The shell appears to be scraps in some places, and may have been a factory second that someone decided to save. While the inside has some weird areas, the bearing edges are crisp and flawless.
A lack of rerings in the 40s would generally mean a Jasper shell, but the plies are not the uniform thickness that I’m used to seeing on Jasper’s 6-ply shells.
The wood hoops are the real crown jewel of this drum. They are original, never touched up and are in excellent condition with no cracks. The hex rods and other W&A parts all combine to make a striking drum.
$1000 plus ship.For more info and photos or to purchase one of these, please contact me.
In my original THREAD Talk post, I discussed the most common thread counts and diameters for wing nuts and bolts on drums and hardware. This post will cover another key component of vintage drums, tension rods.
This article will cover five of the most common thread counts on drum tension rods from before about 1980. I won’t be dealing with modern-only thread counts, such as DW’s True Pitch rods.
Vintage Drum Tension Rod Threads
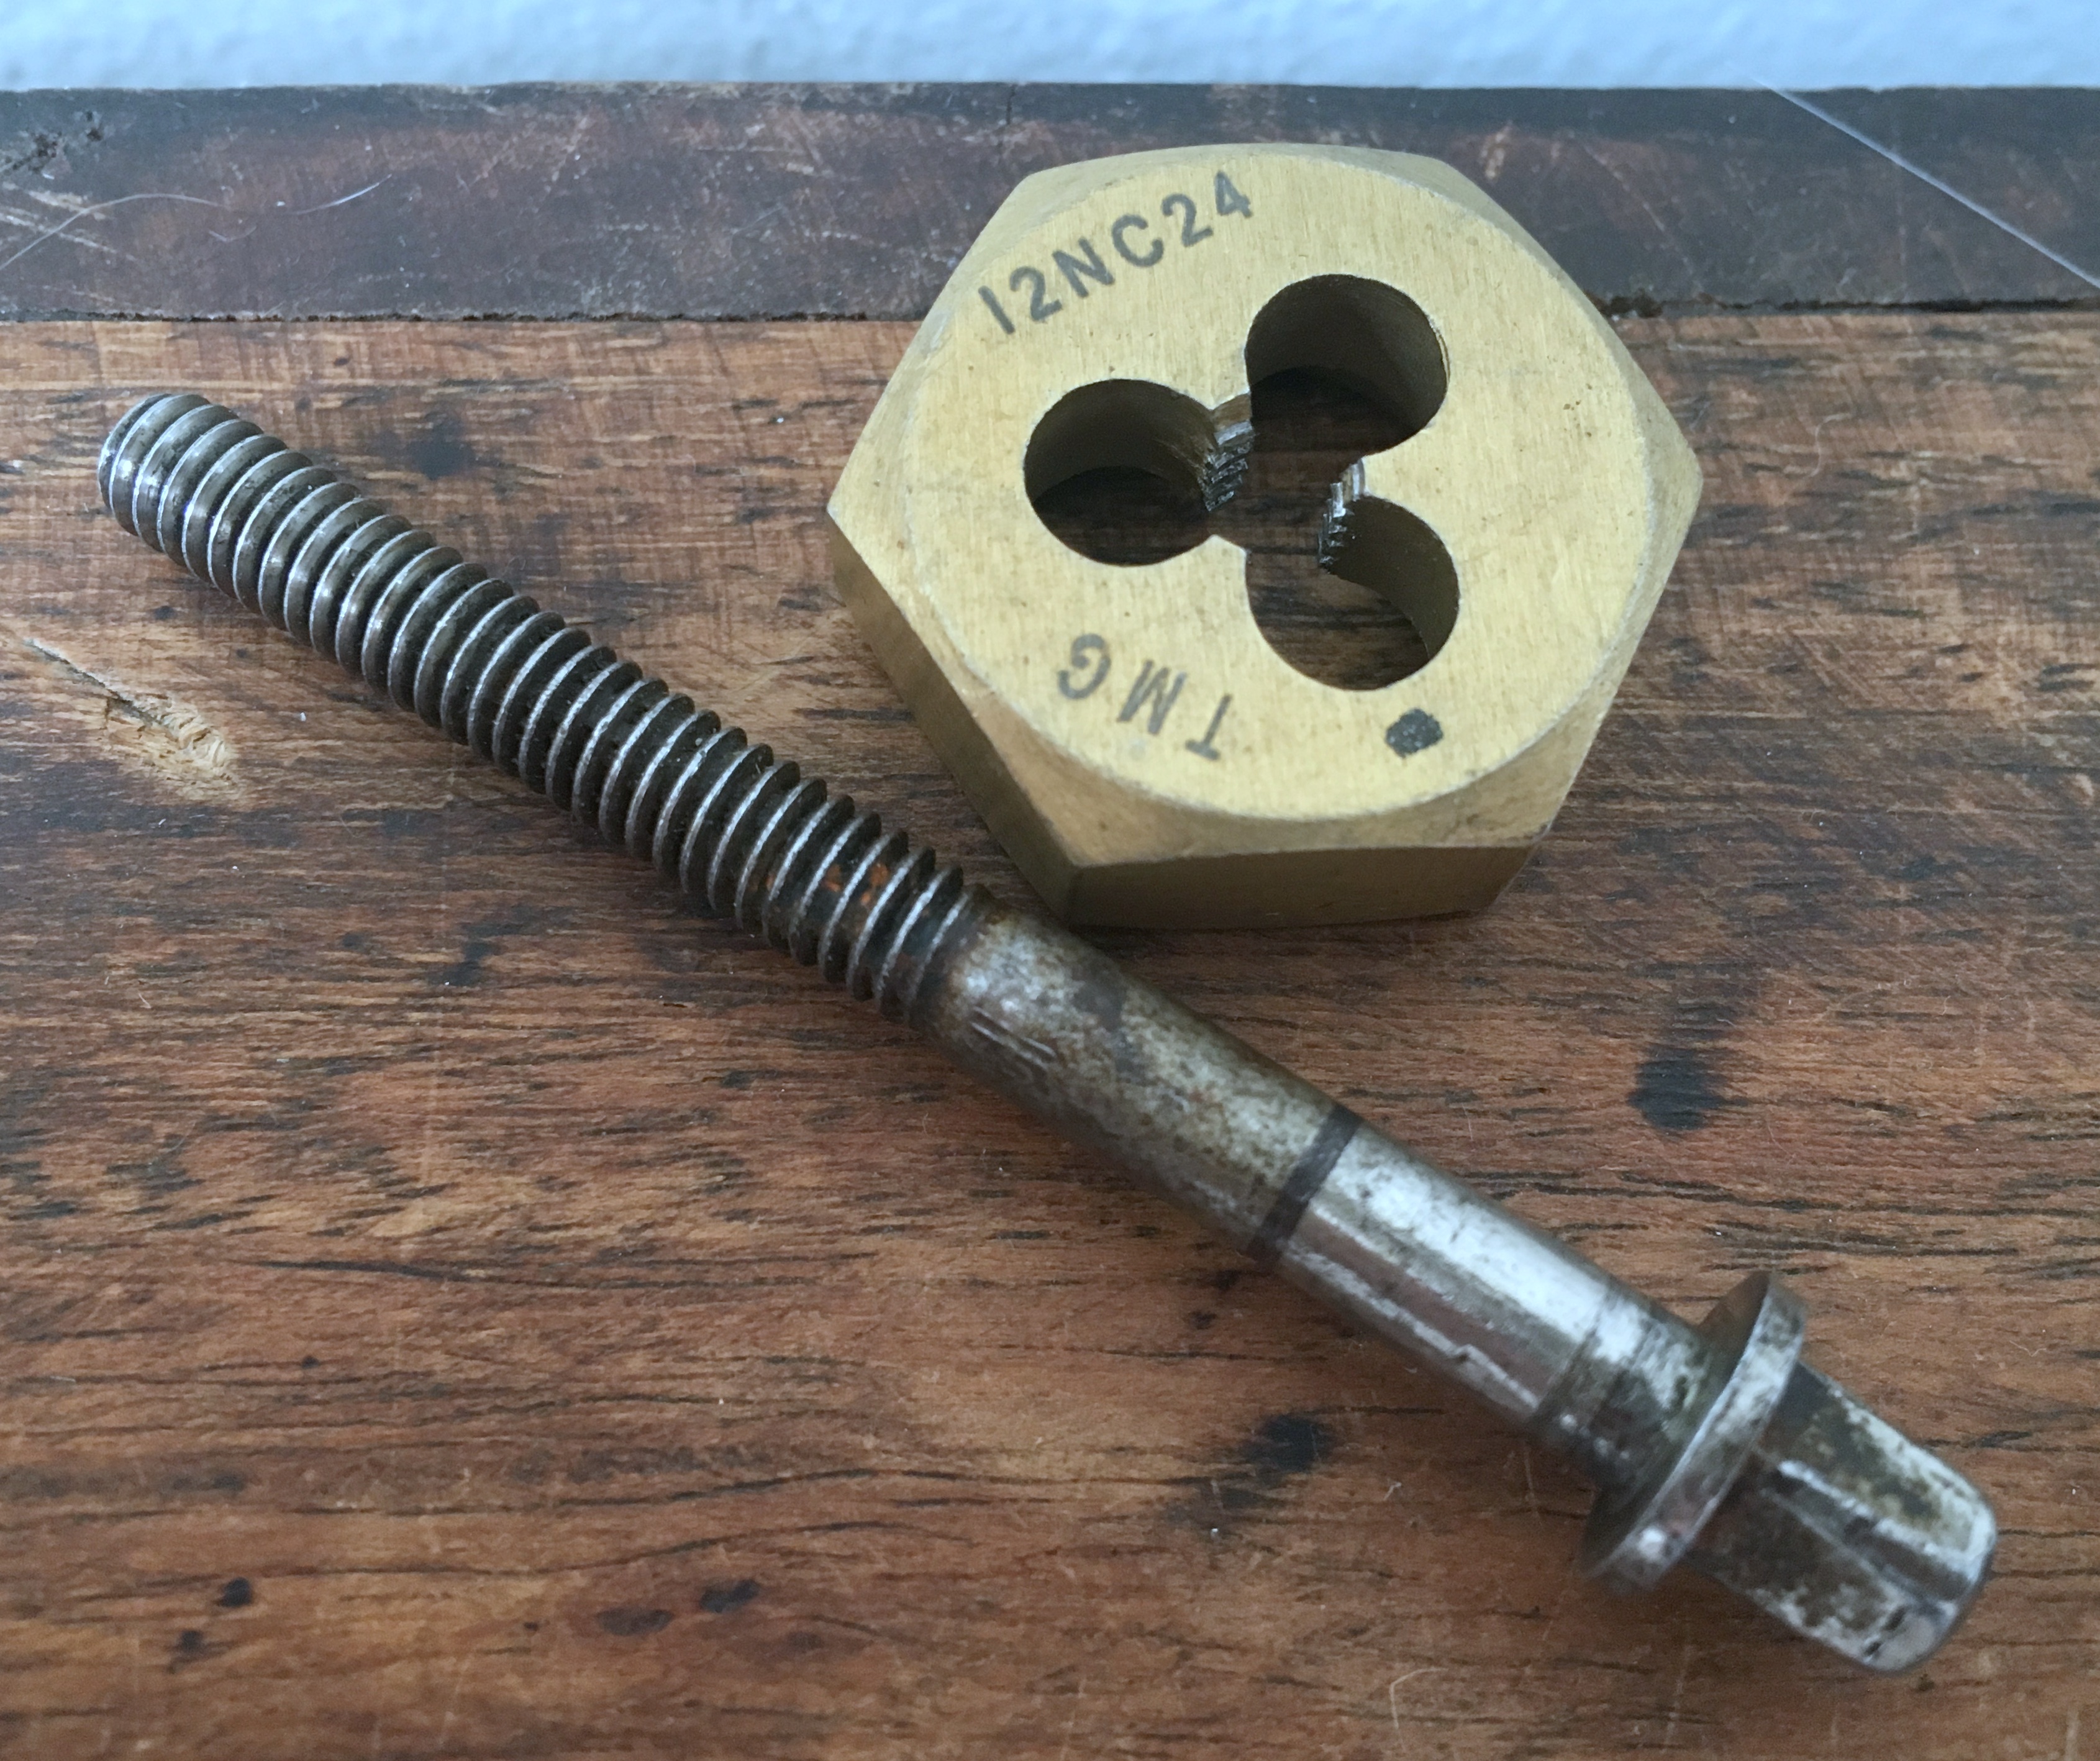
12-24: Standard US Tension Rod Thread
12-24 tension rod
The 12-24 thread has long been the common standard among US makers, used at least as far back as the 1920s and possibly earlier. It was eventually adopted by nearly every drum manufacturer and is now the global standard.
This thread is the reason you can mix different brands of tension rods on almost any drum set.
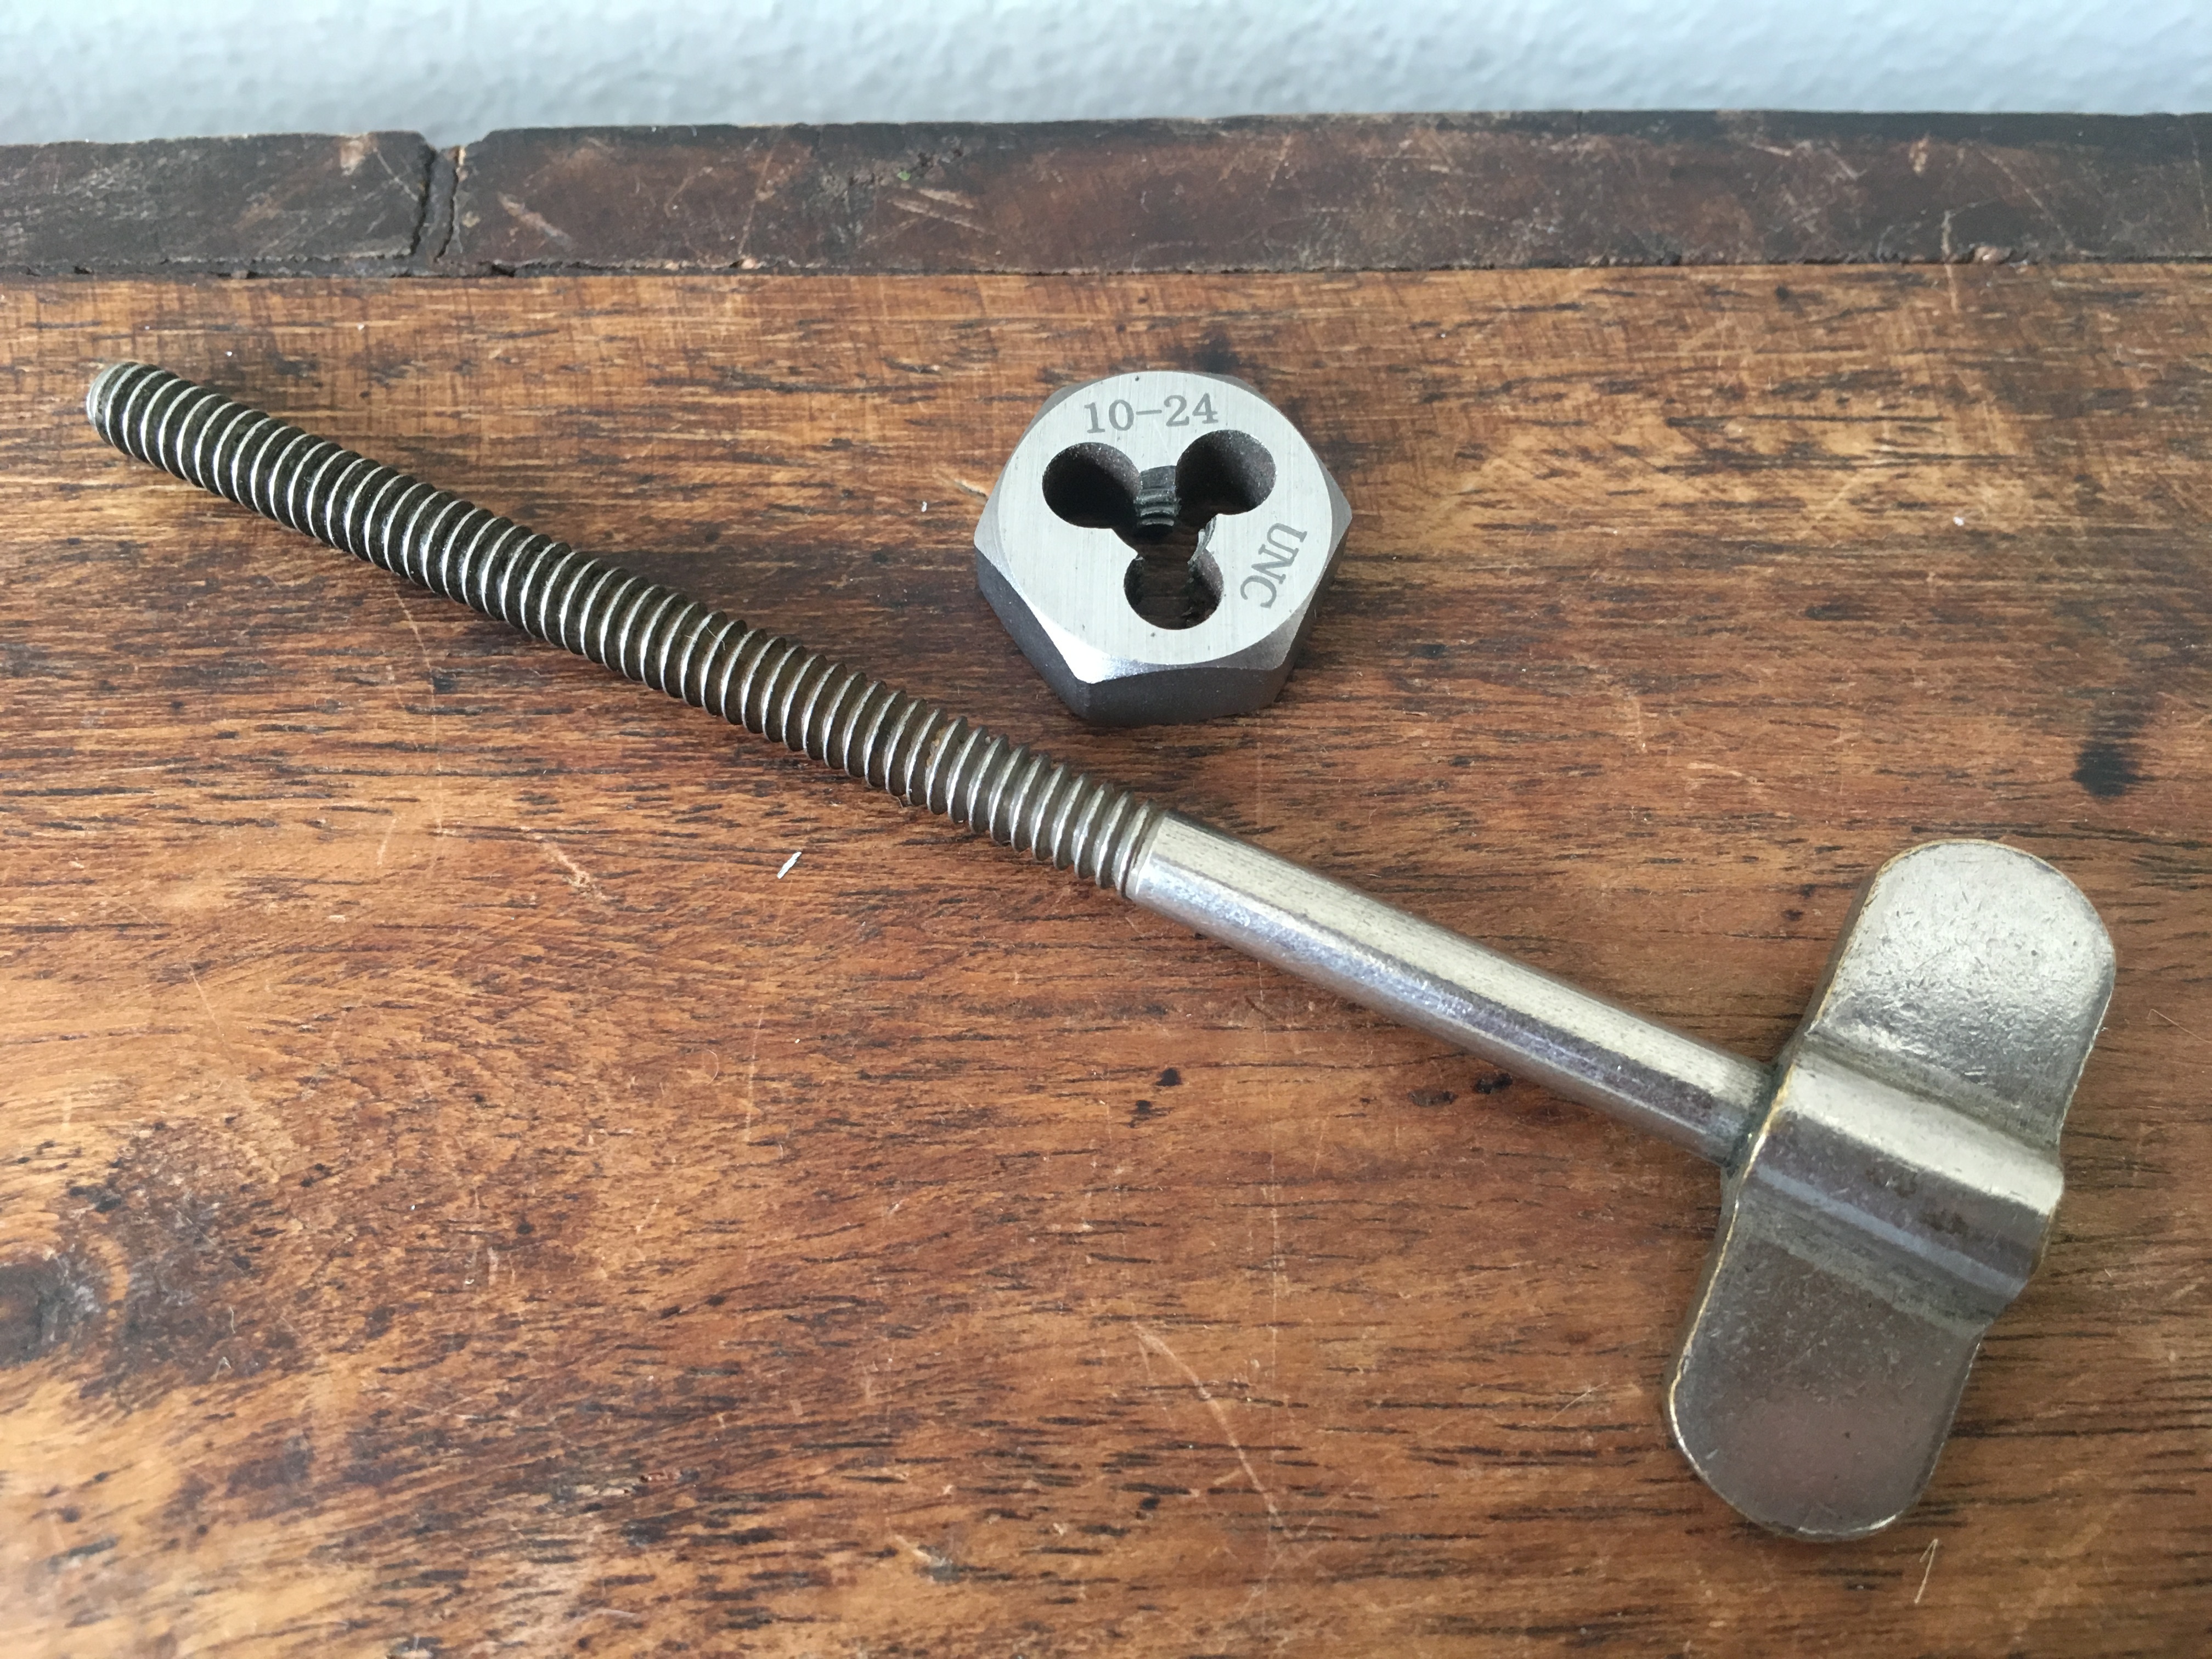
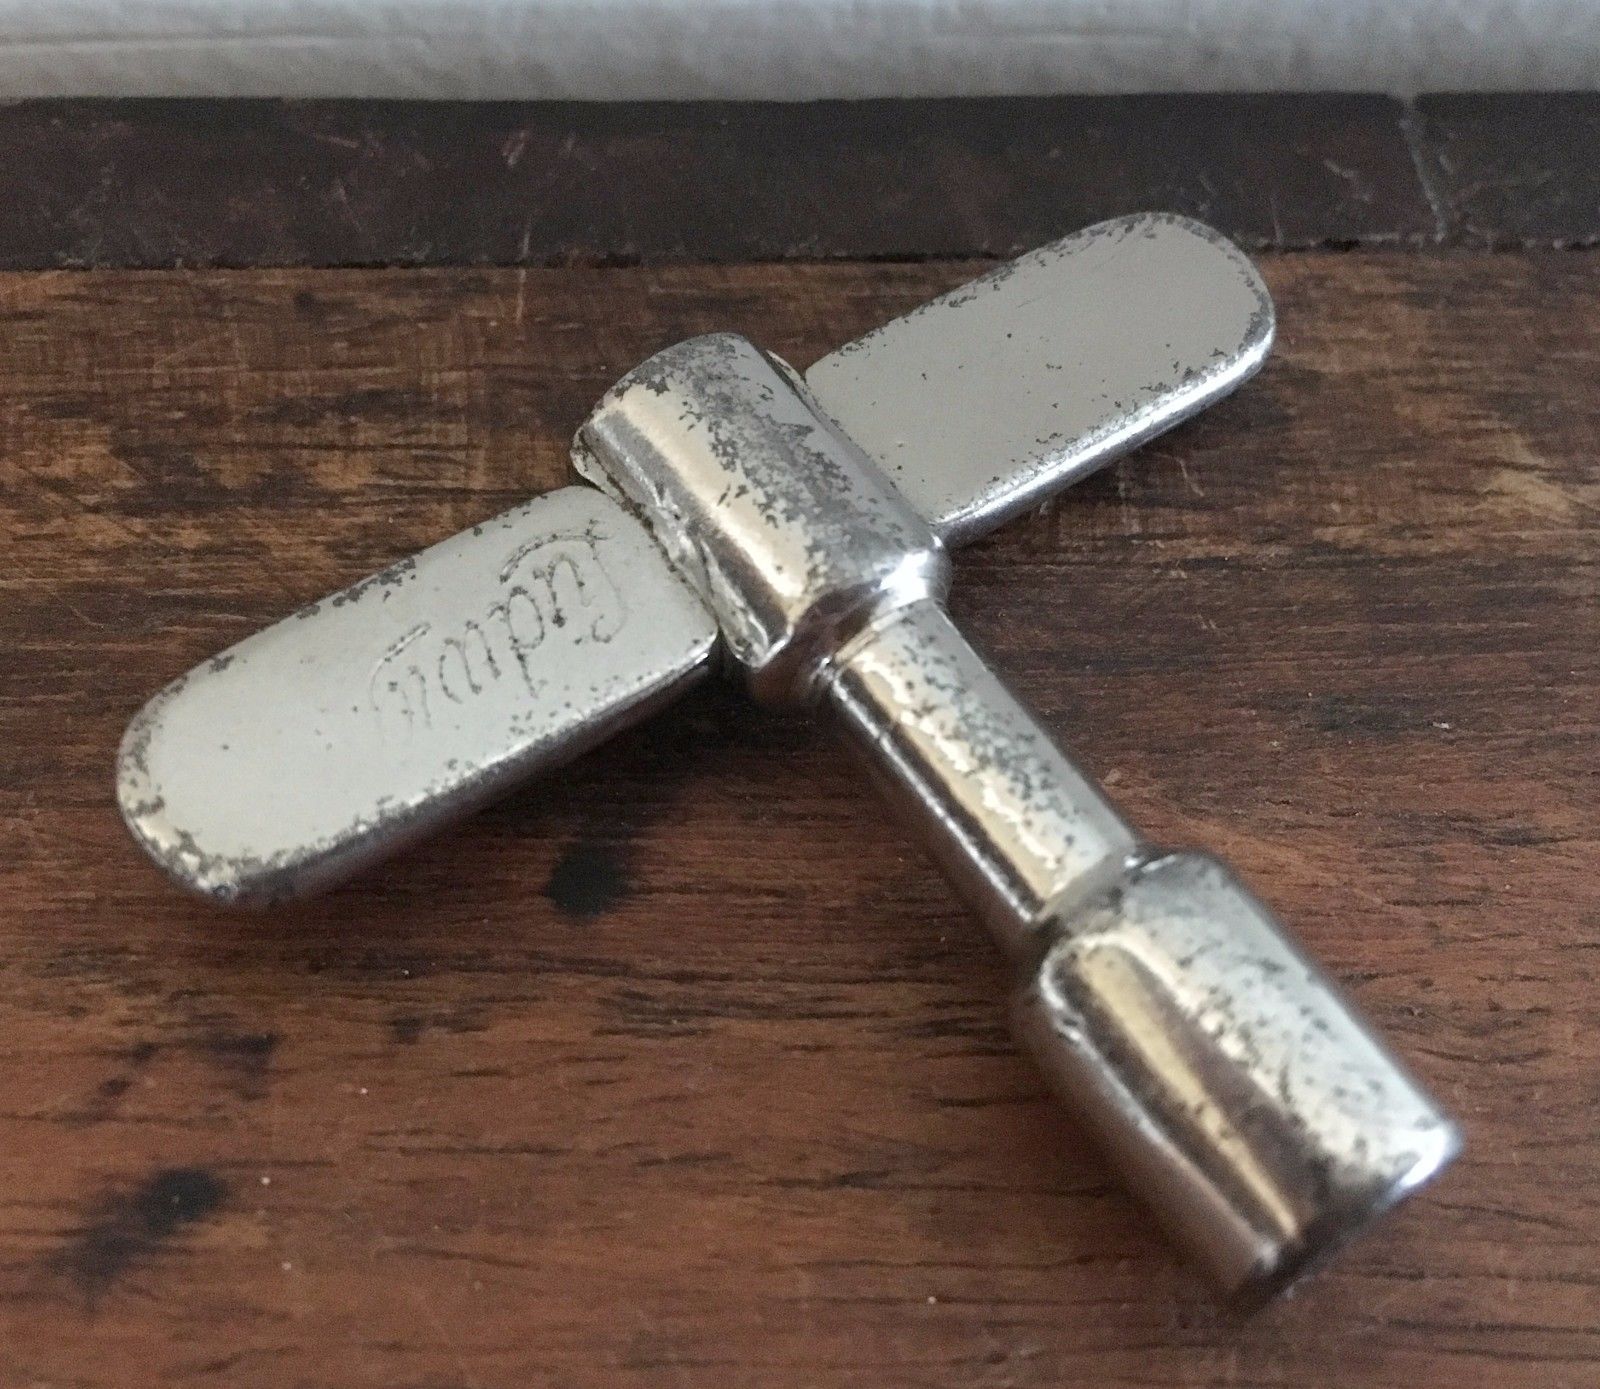
10-24: Leedy/Walberg & Auge Skinny Rods
10-24 tension rod
The thinner 10-24 standard is now long lost to history but was the thread used by Leedy, famously the largest drum maker in the world at one time.
Leedy made a lot of drums that used single tension thumb rods like the one pictured above (and/or used rods made by the Walberg & Auge company). Most of these were 10-24 thread. Many of their slot head dual tension rods were also 10-24. These are especially difficult to track down today, forcing some to used hex head bolts from the hardware store to play their vintage drums.
Common in the 1920s and 30s, this thread probably started to fade away around the 40s as the Leedy company was sold and restructured multiple times and as dual tension drums became the norm. Chrome examples are somewhat rare.
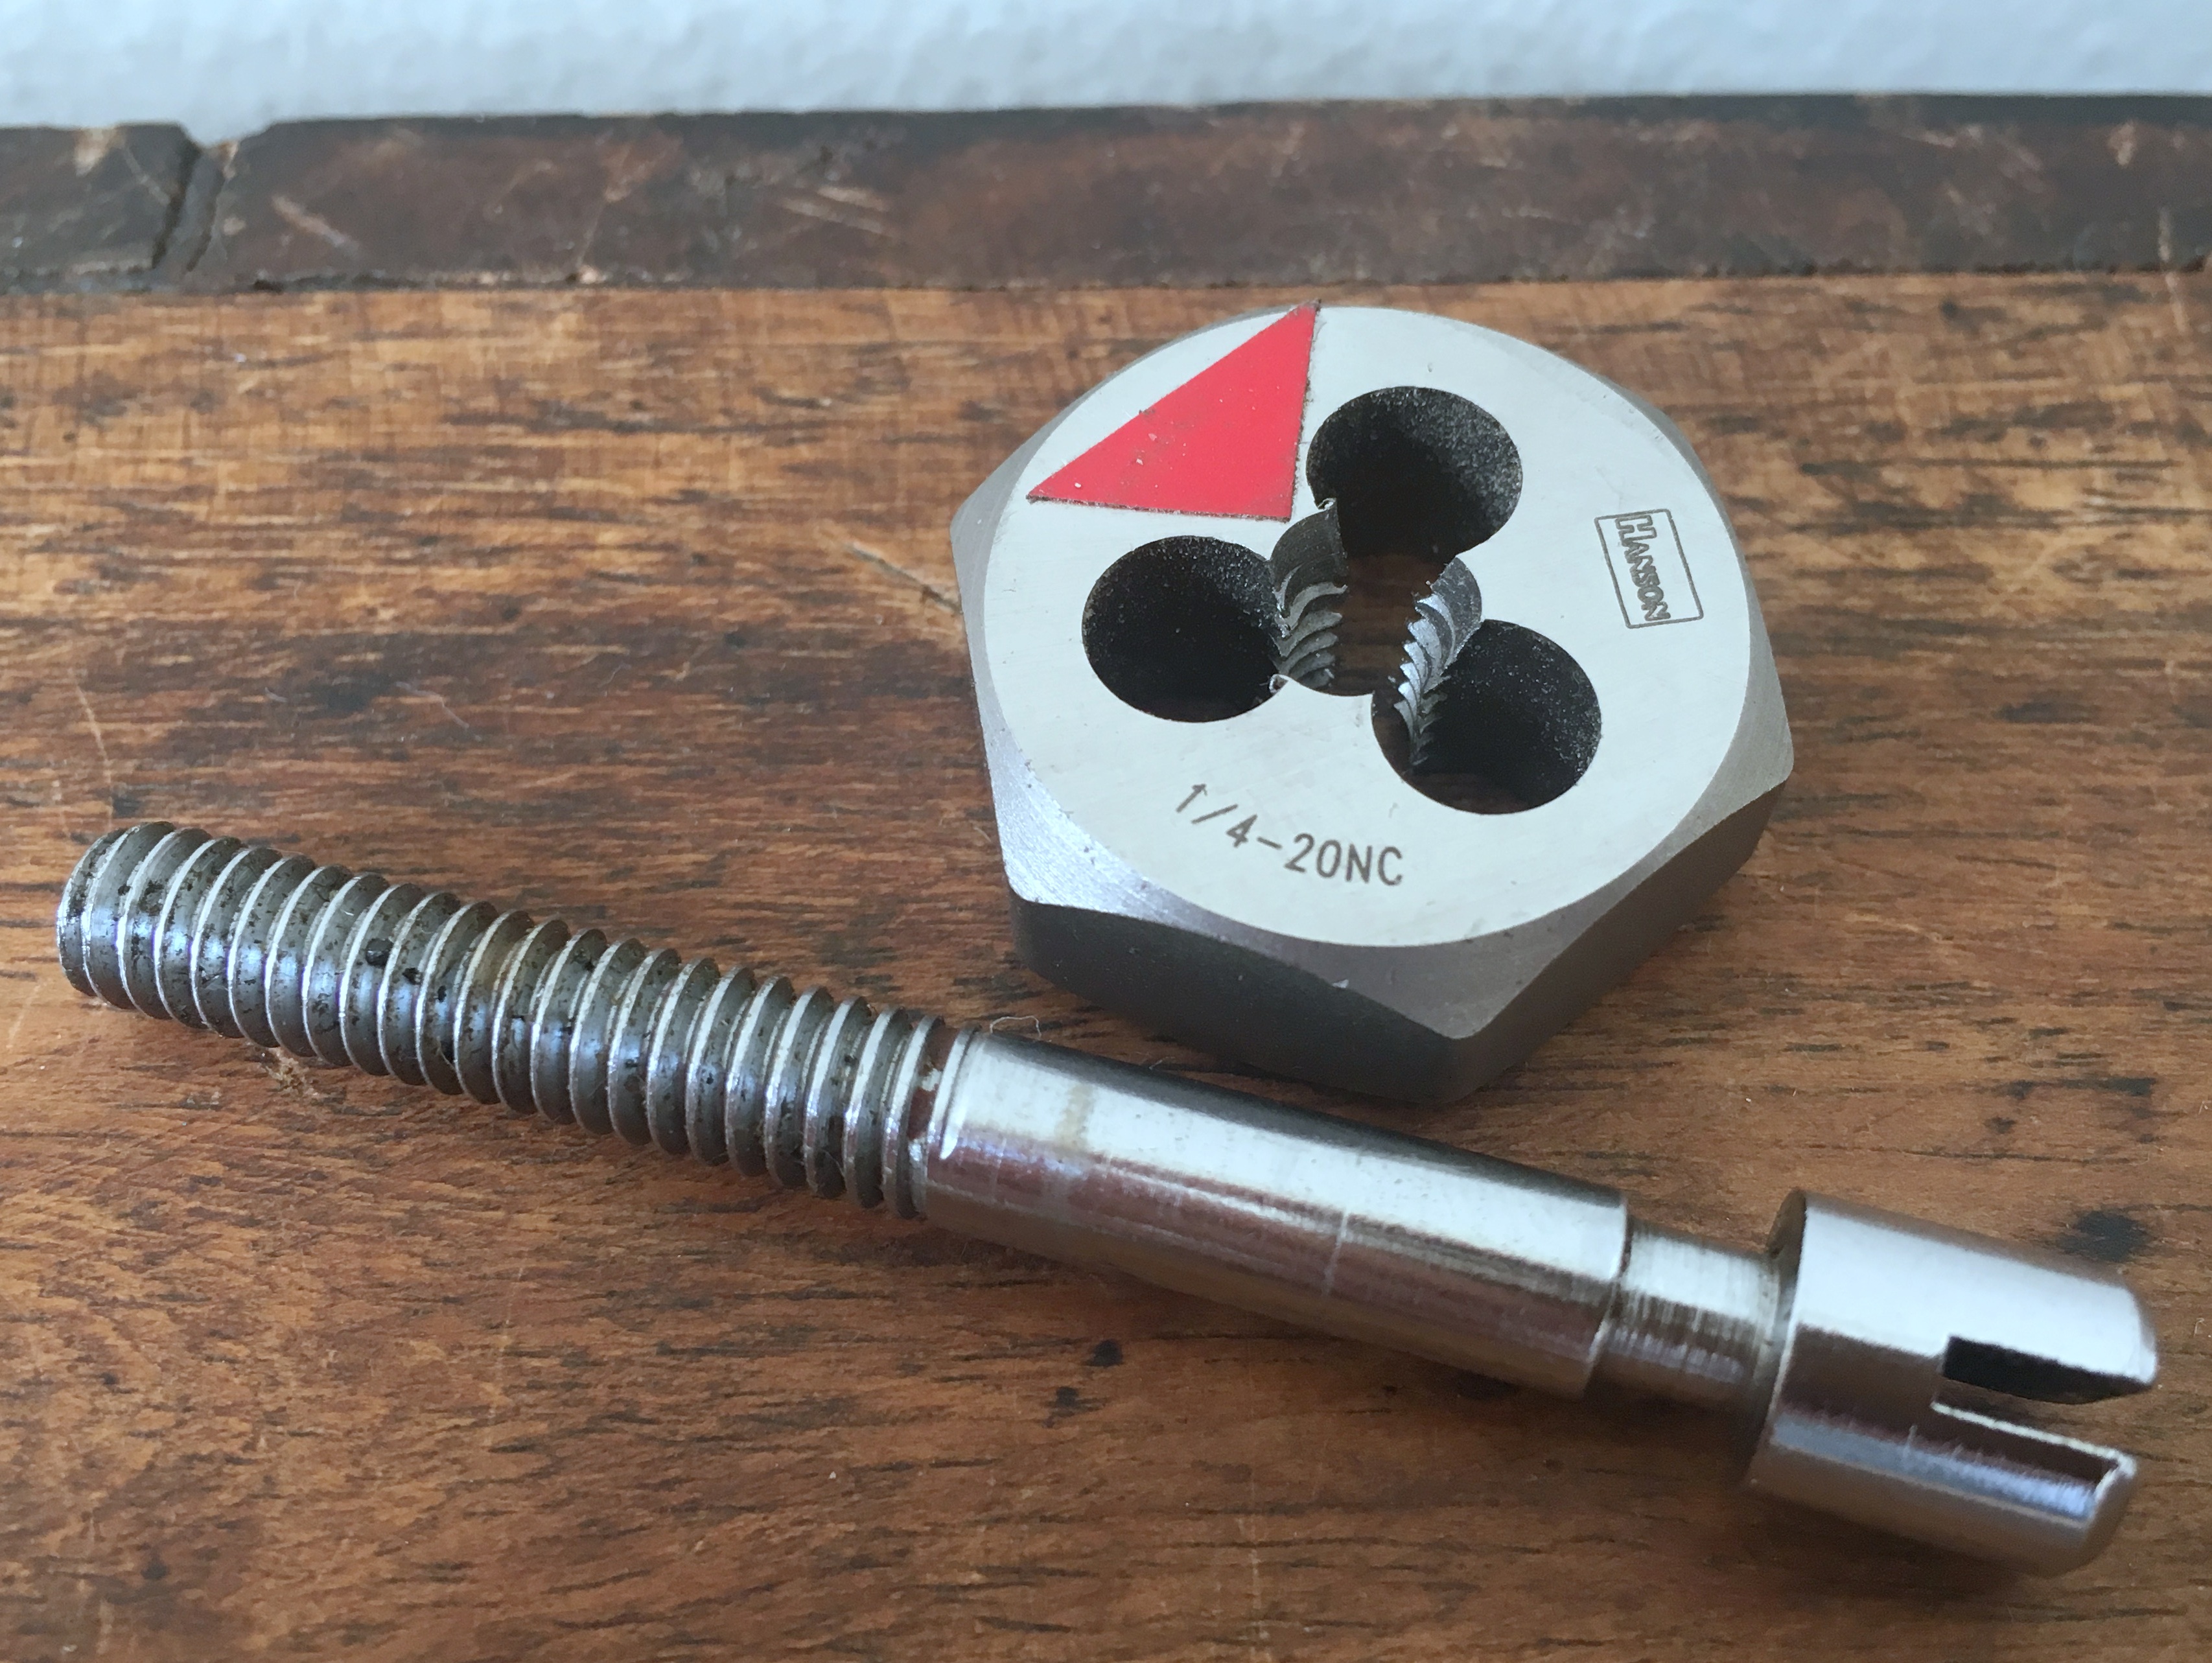
1/4-20: Sonor and Japanese Makers
1/4-20 tension rod
The 1/4-20 thread that appeared on the majority of vintage wing nuts and bolts was also used by some Japanese drum makers for bass drum tension rods.
Sonor has long used 1/4-20 tension rods for some of their lines made in Germany, and continues to currently.
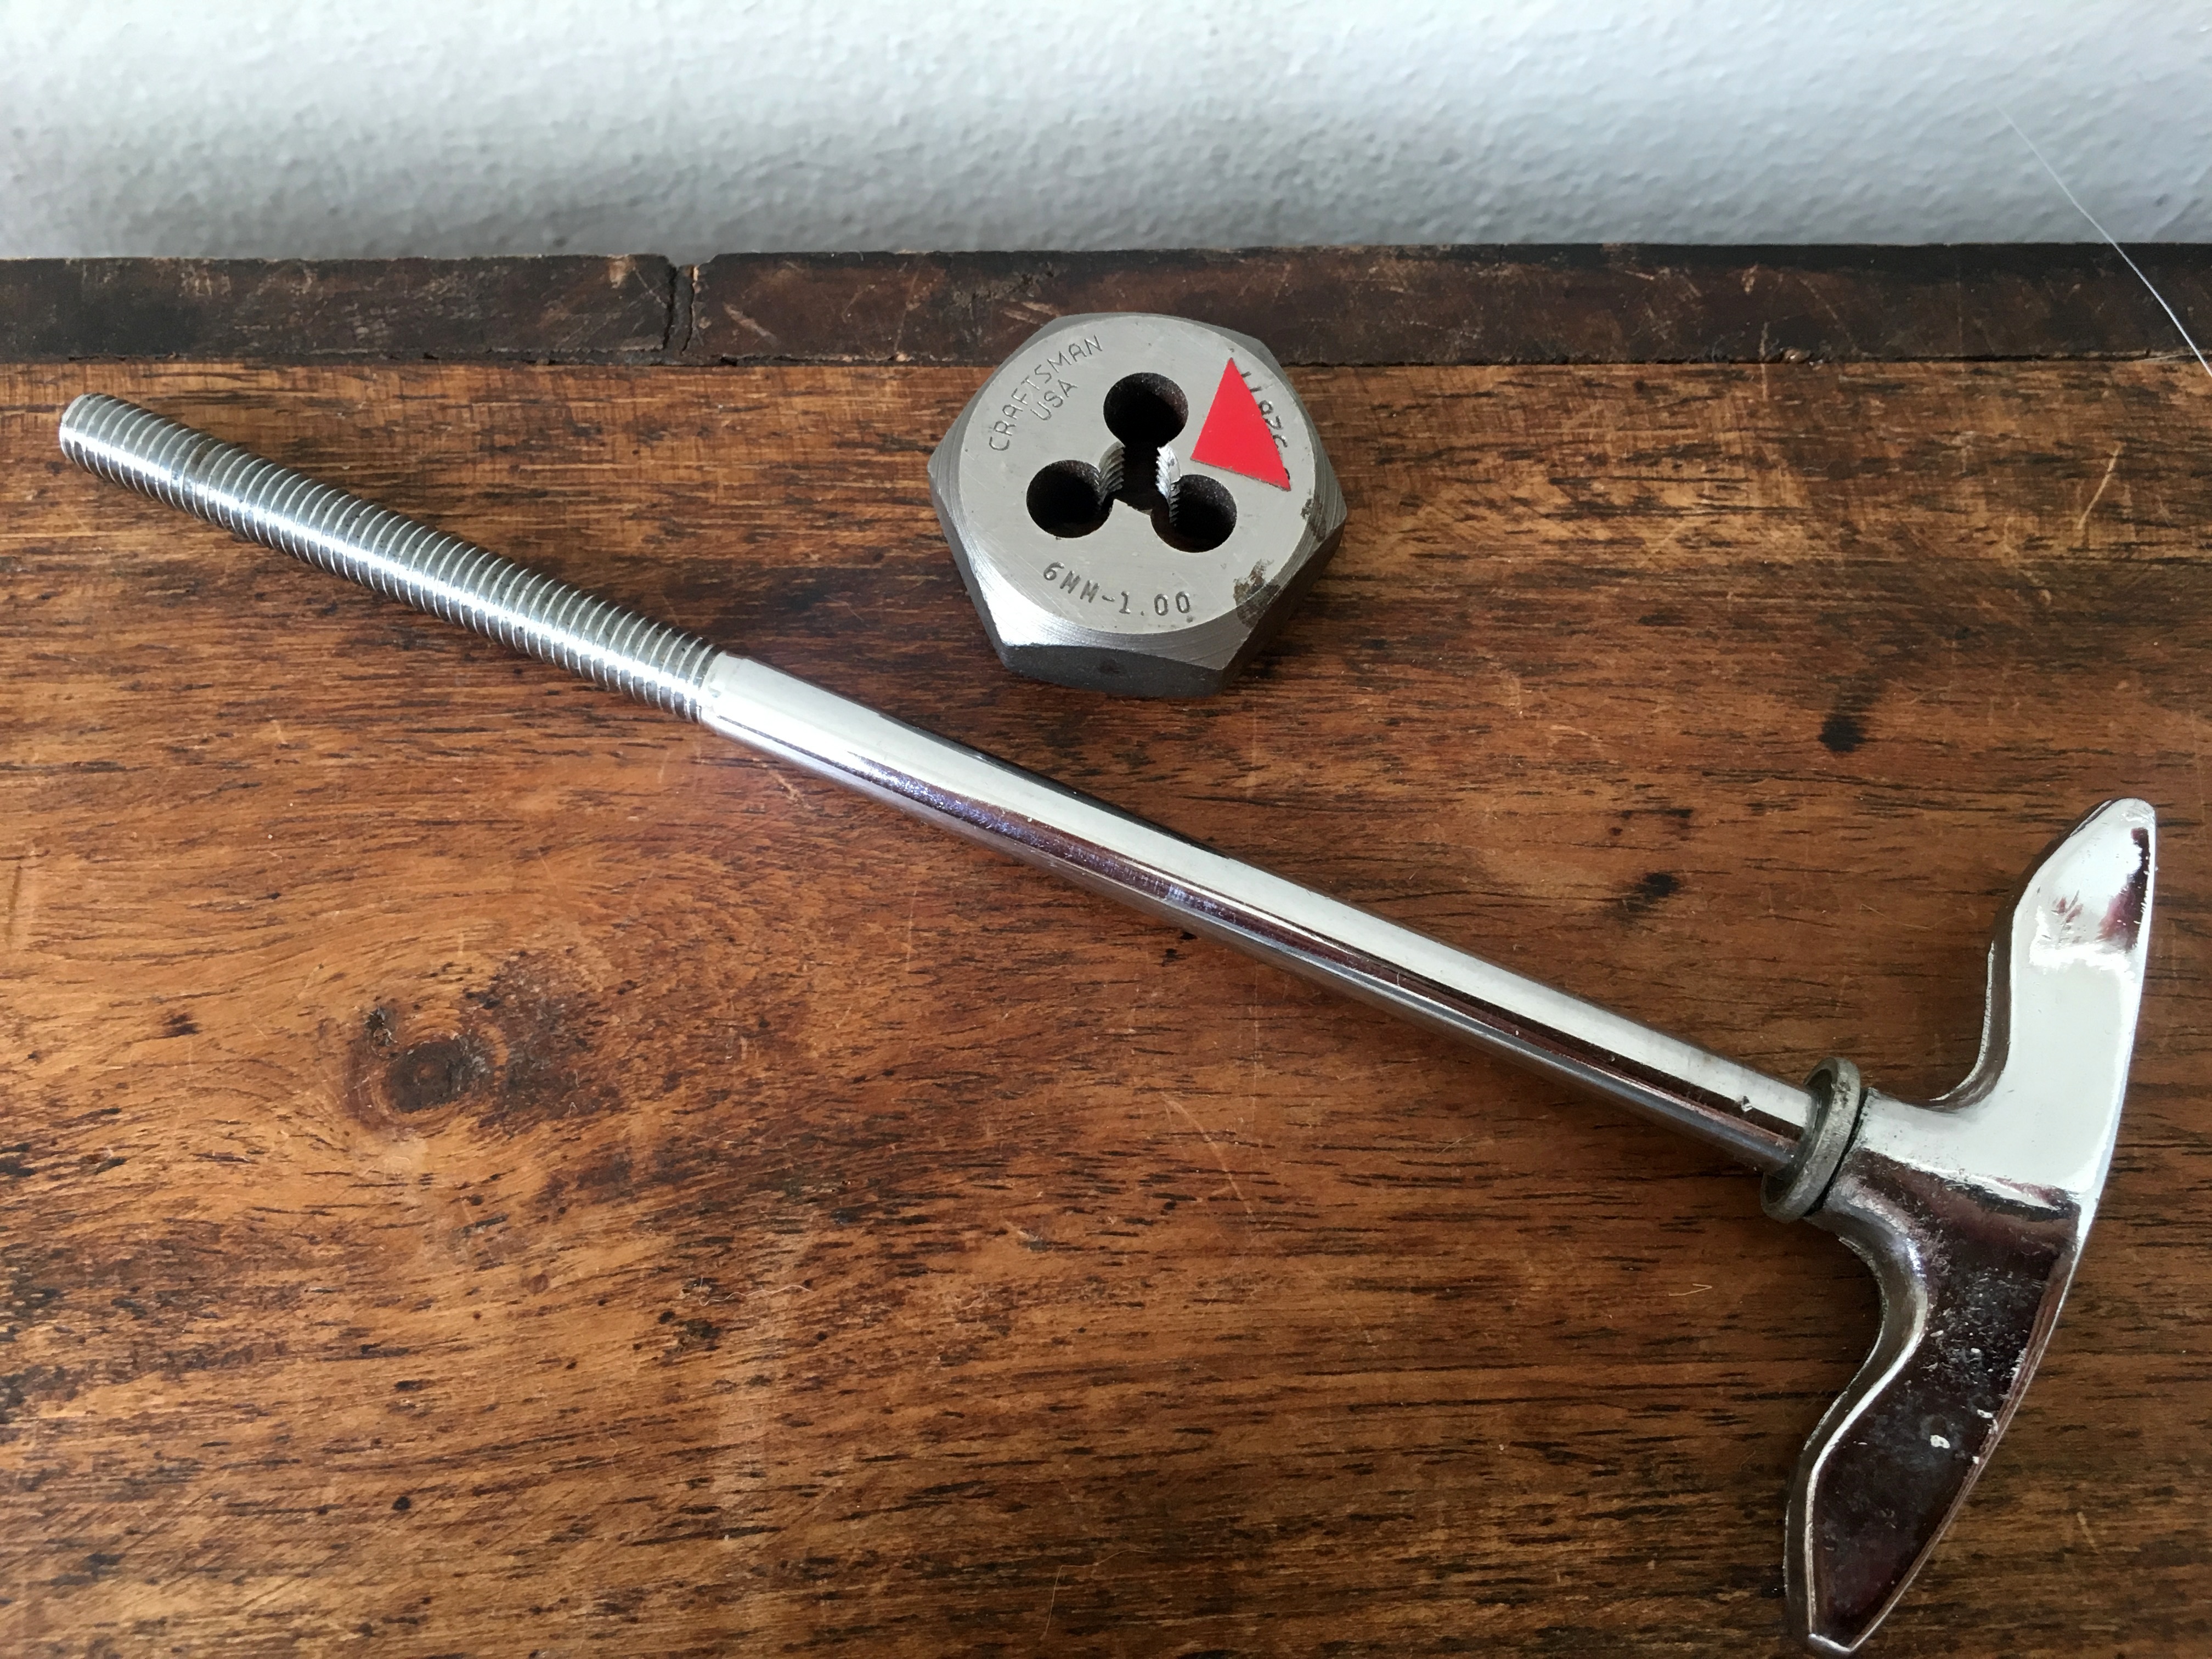
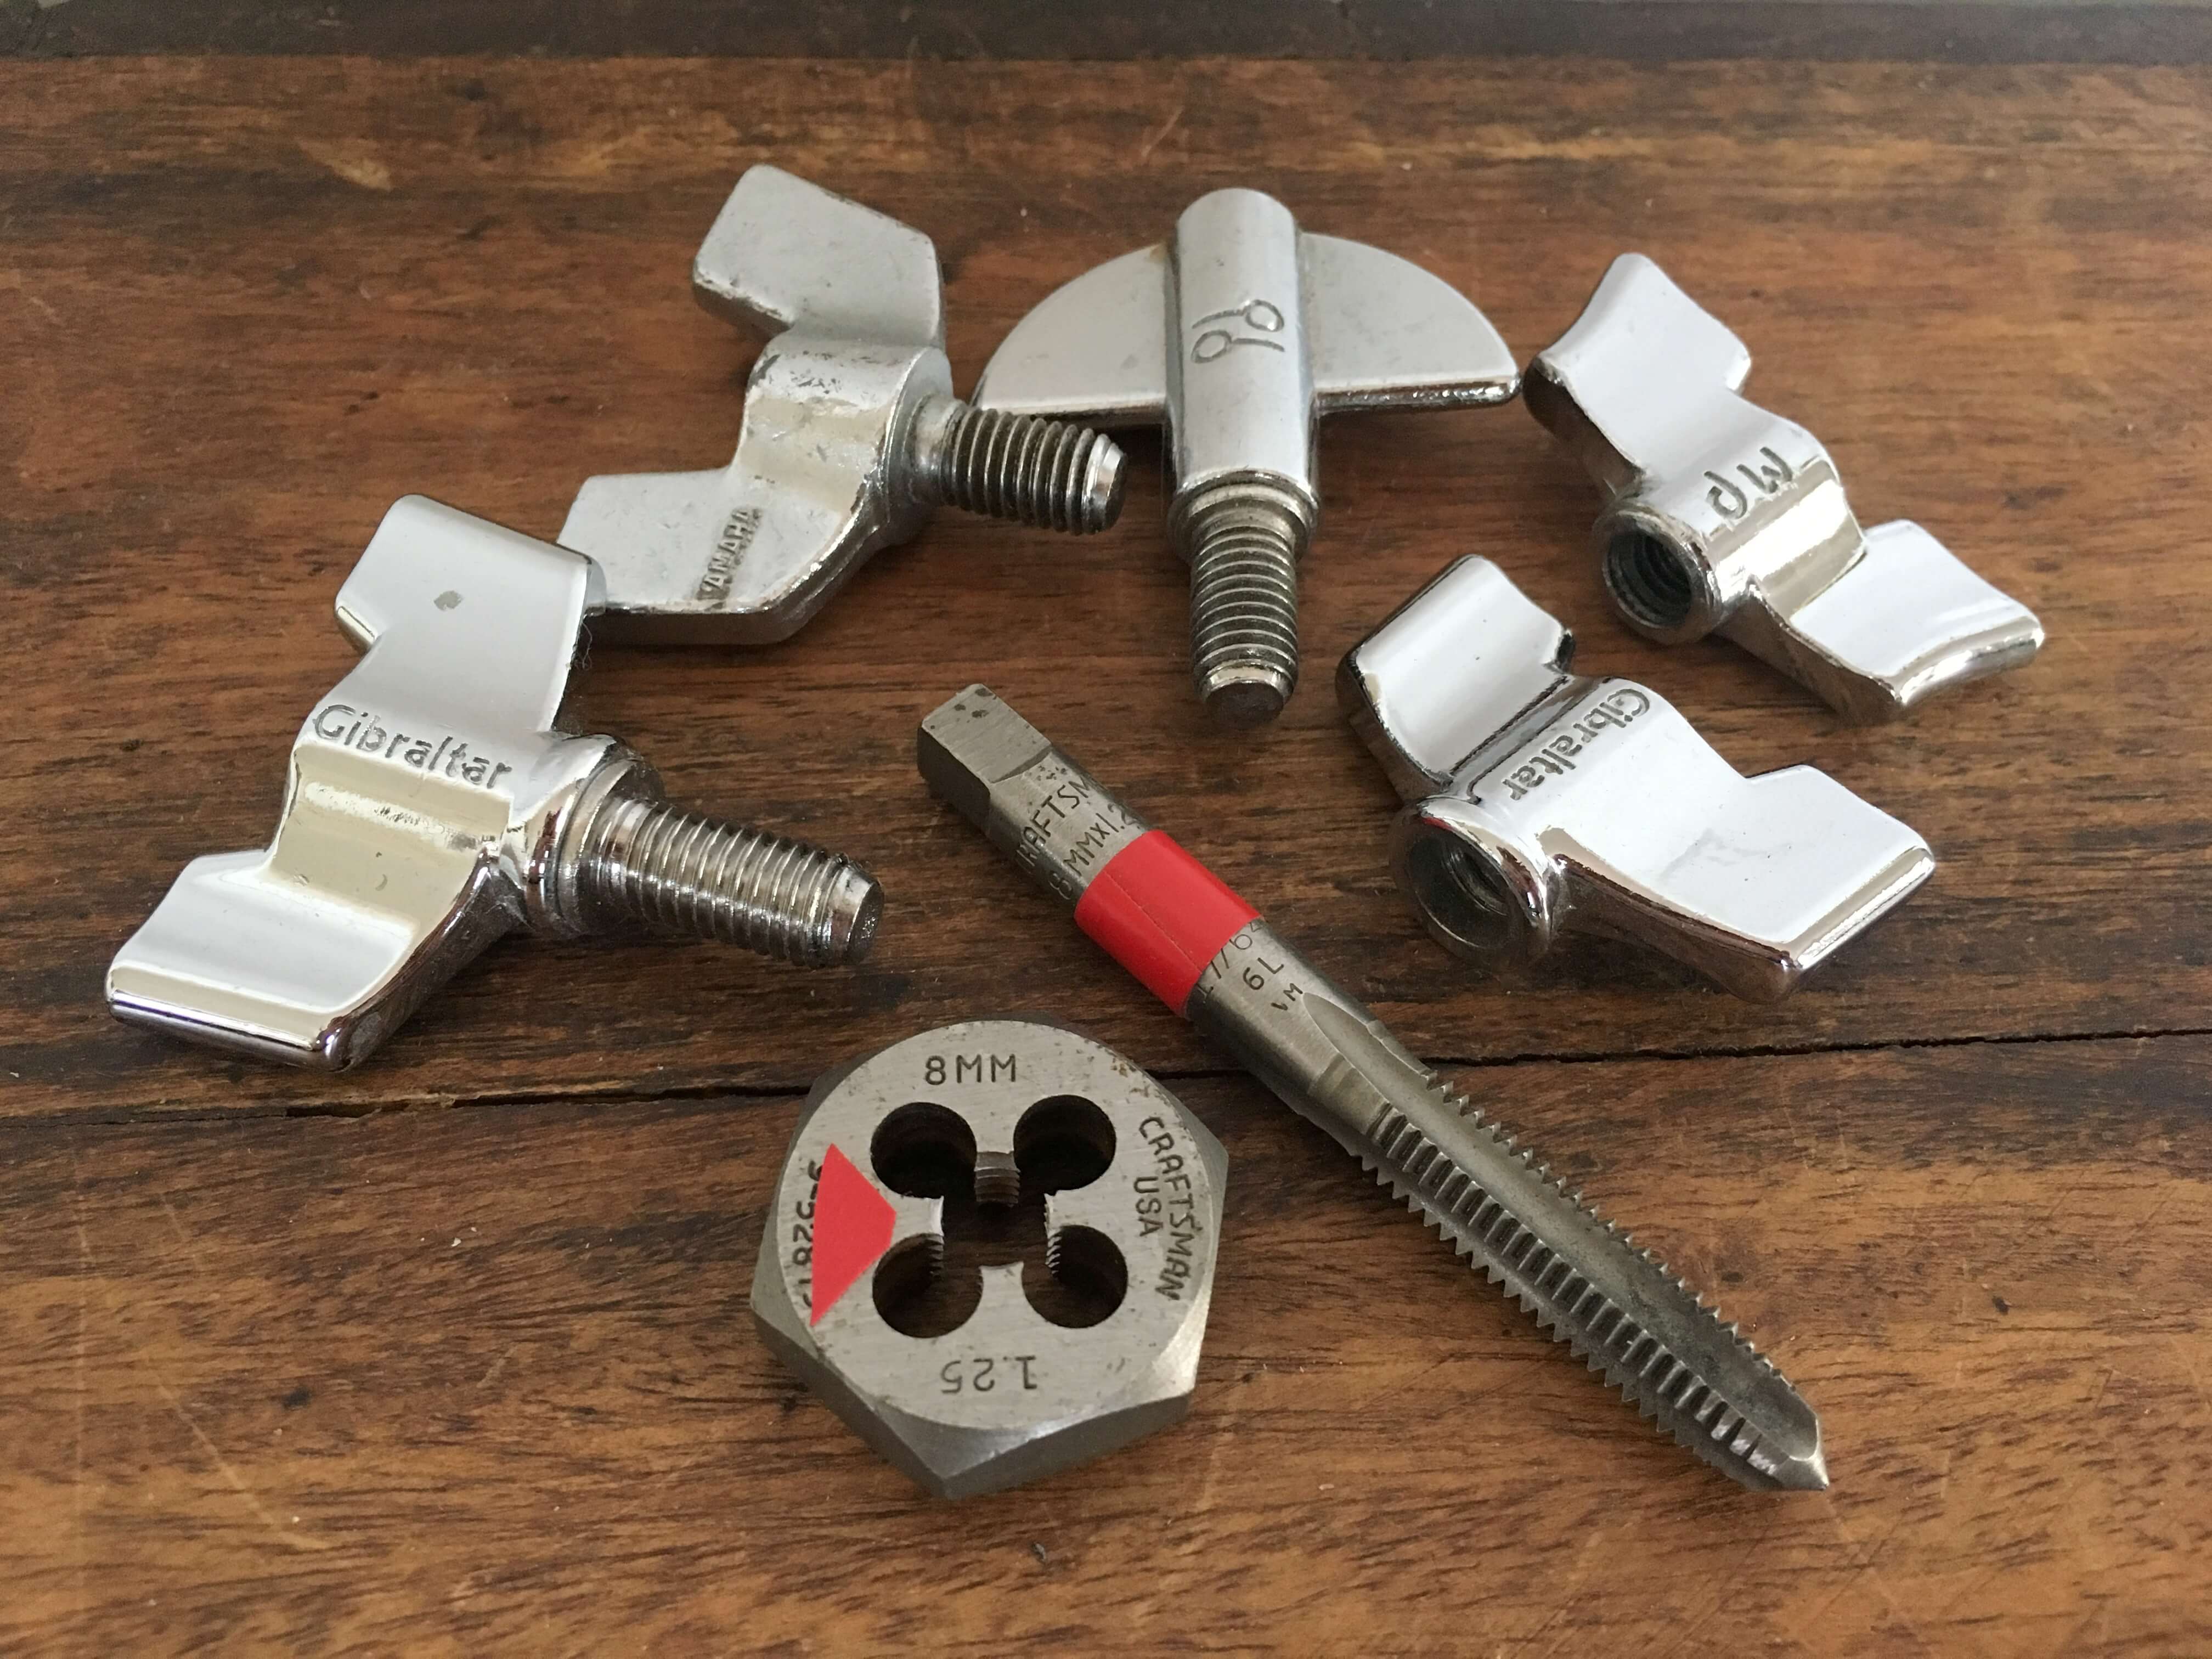
6mm-1.00: Common MIJ Bass Drum Thread
6mm tension rod
Though some Japanese makers used 1/4-20, 6mm was the more common standard of the era for bass drums.
Use of this thread continued among Japanese and Taiwanese makers throughout the 70s and possibly later. It lives on today as a common standard for wing nuts and bolts on drum hardware, but is no longer used for tension rods as far as I can tell.
6mm is one to watch out for when swapping lug inserts, as a 12-24 tension rod will fit into it and may appear to catch correctly until under significant tension.
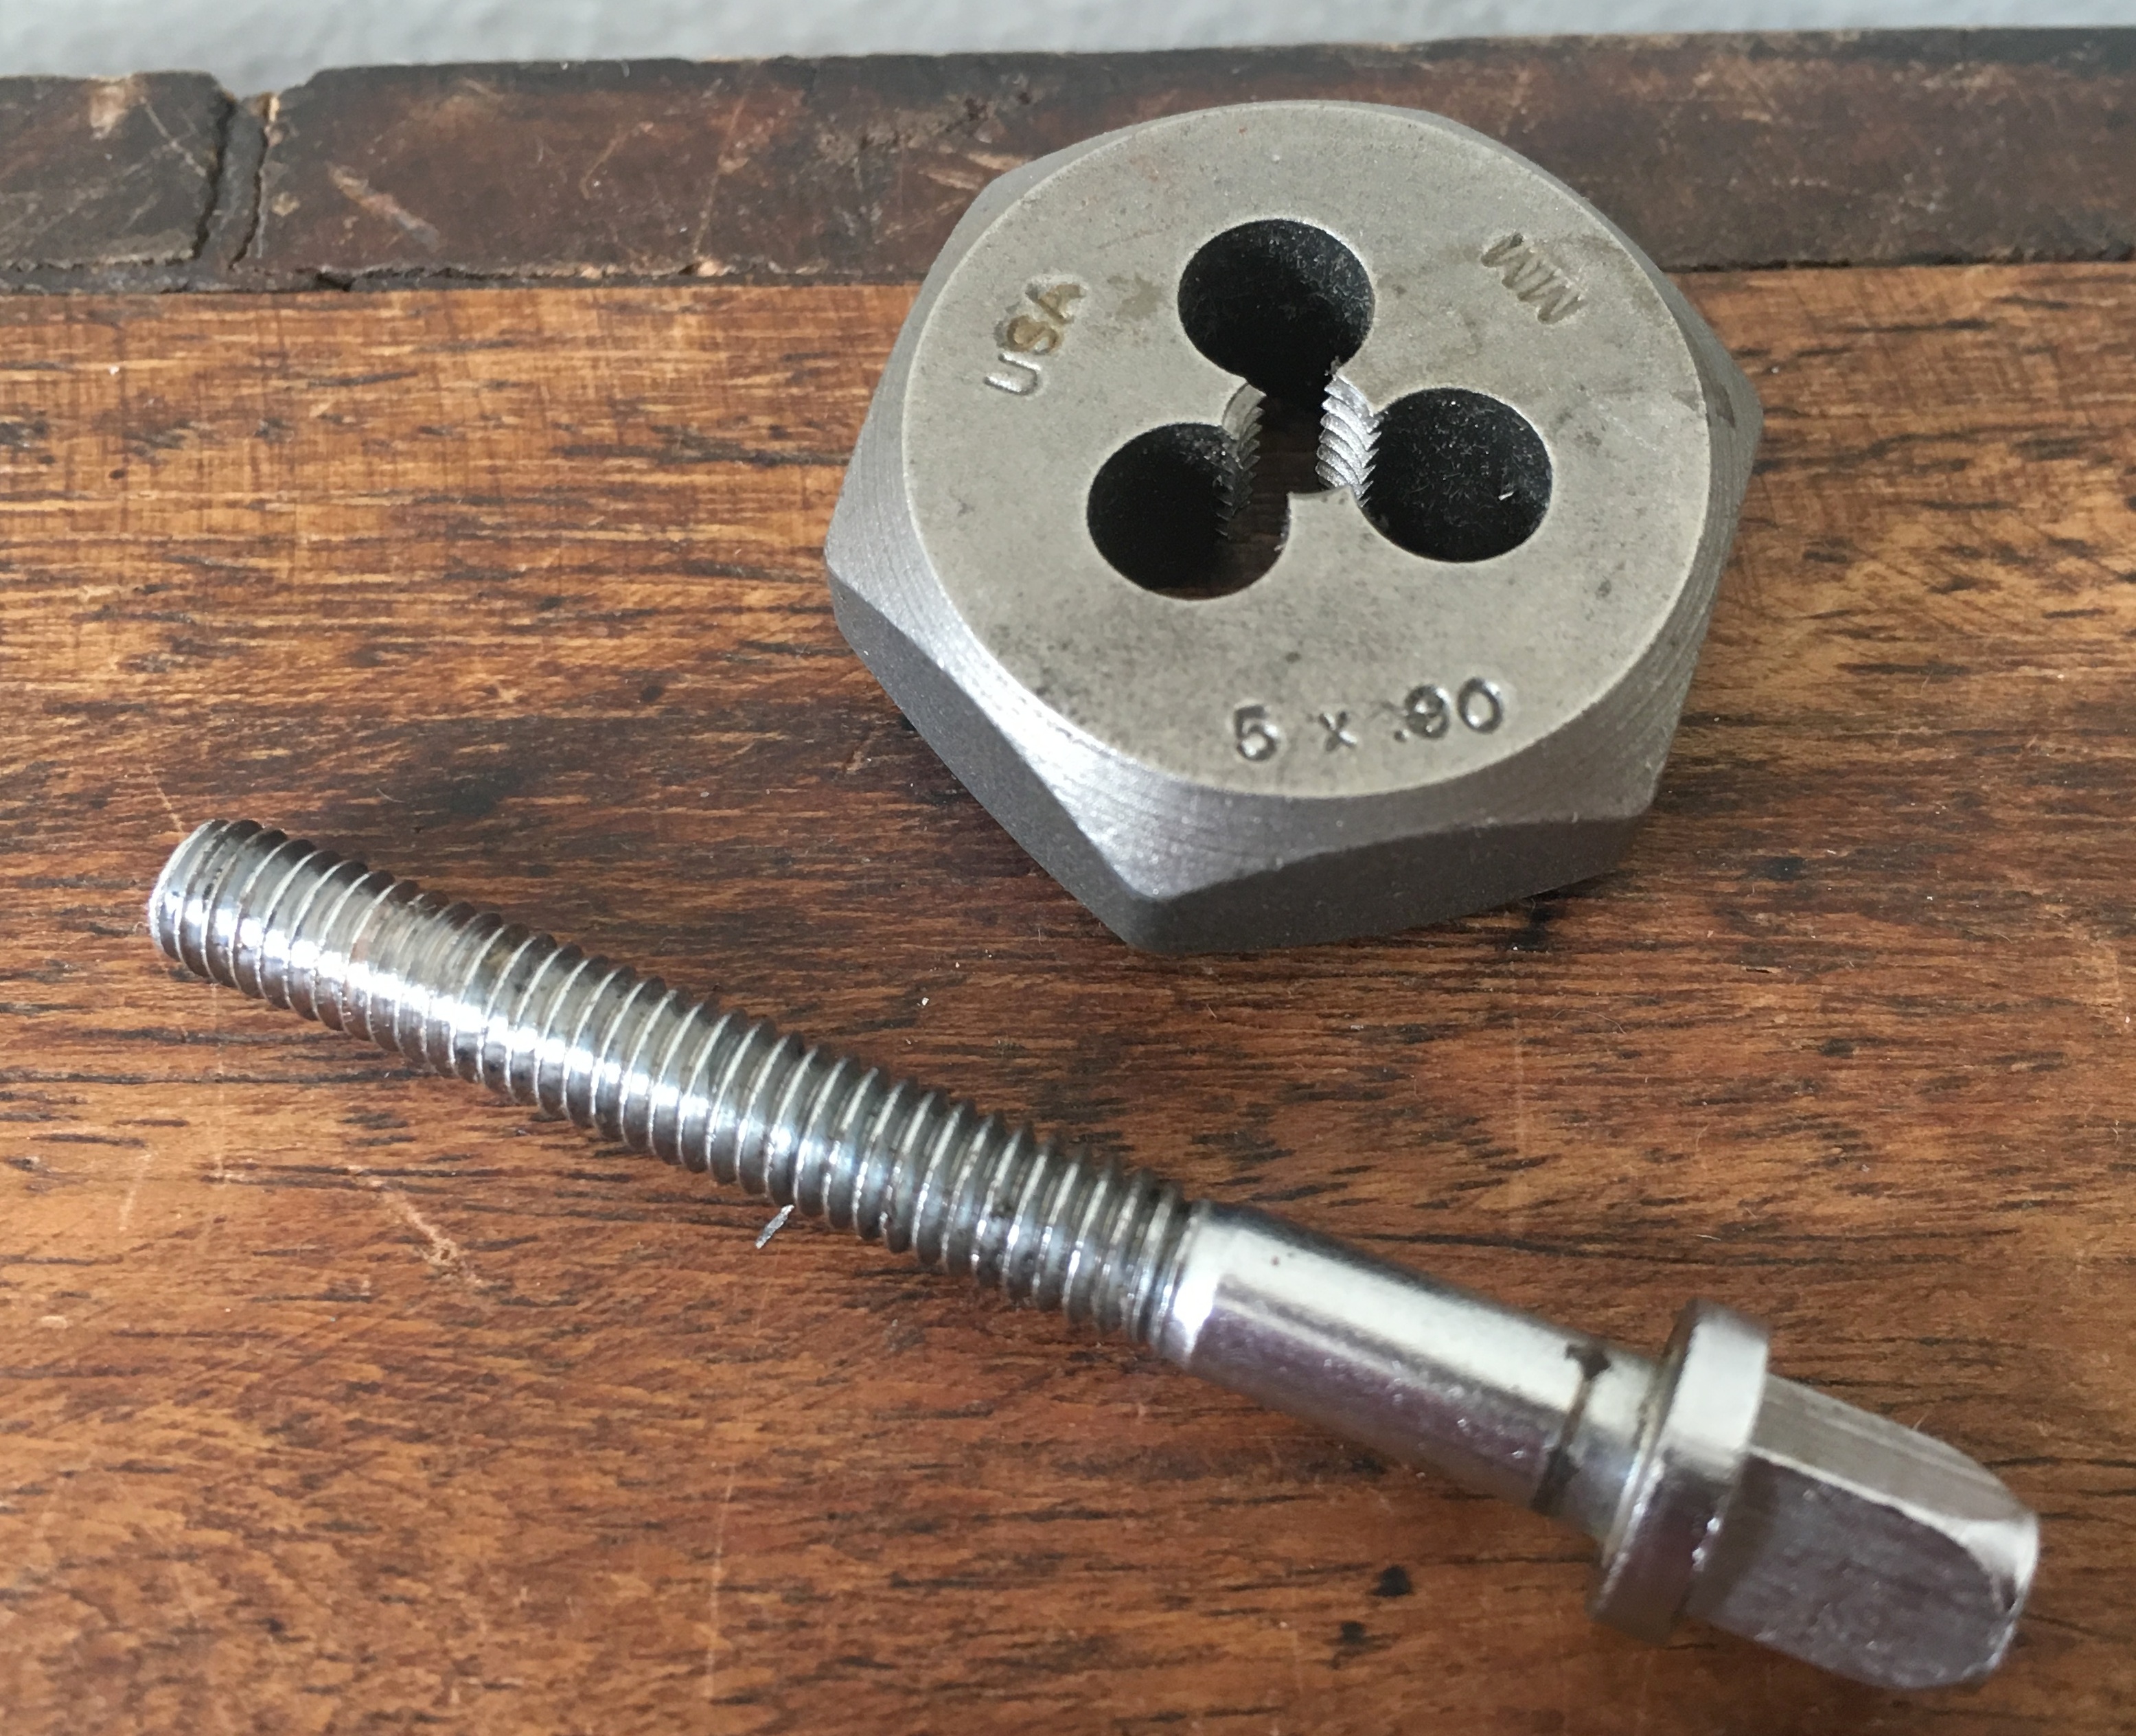
5mm-.9: the Undersized Japanese Thread
5mm-.9 tension rod
For snares and toms, Japanese drum makers of the 50s through the 70s utilized both the US 12-24 thread and the smaller 5mm one. Use of this thread probably ended around the time that import drum manufacturing began to spread from Japan to Taiwan.
Other Threads
There are other thread counts that were used in Europe on brands such as Meazzi and Trixon, which I consider obscure enough to exclude here. Those may be covered in a future addendum if I can track down some good specimens.
I’ve long wanted a quick reference for common thread counts of drum parts, so I figured I’d just write one myself. This article covers the five most common thread diameters and counts for US-made drum wing nuts and bolts. Use the information herein to buy an appropriate tap and die set, or just to order parts accurately.
I’ll try to list what each thread is/was commonly used for. We’ll start with the vintage ones.
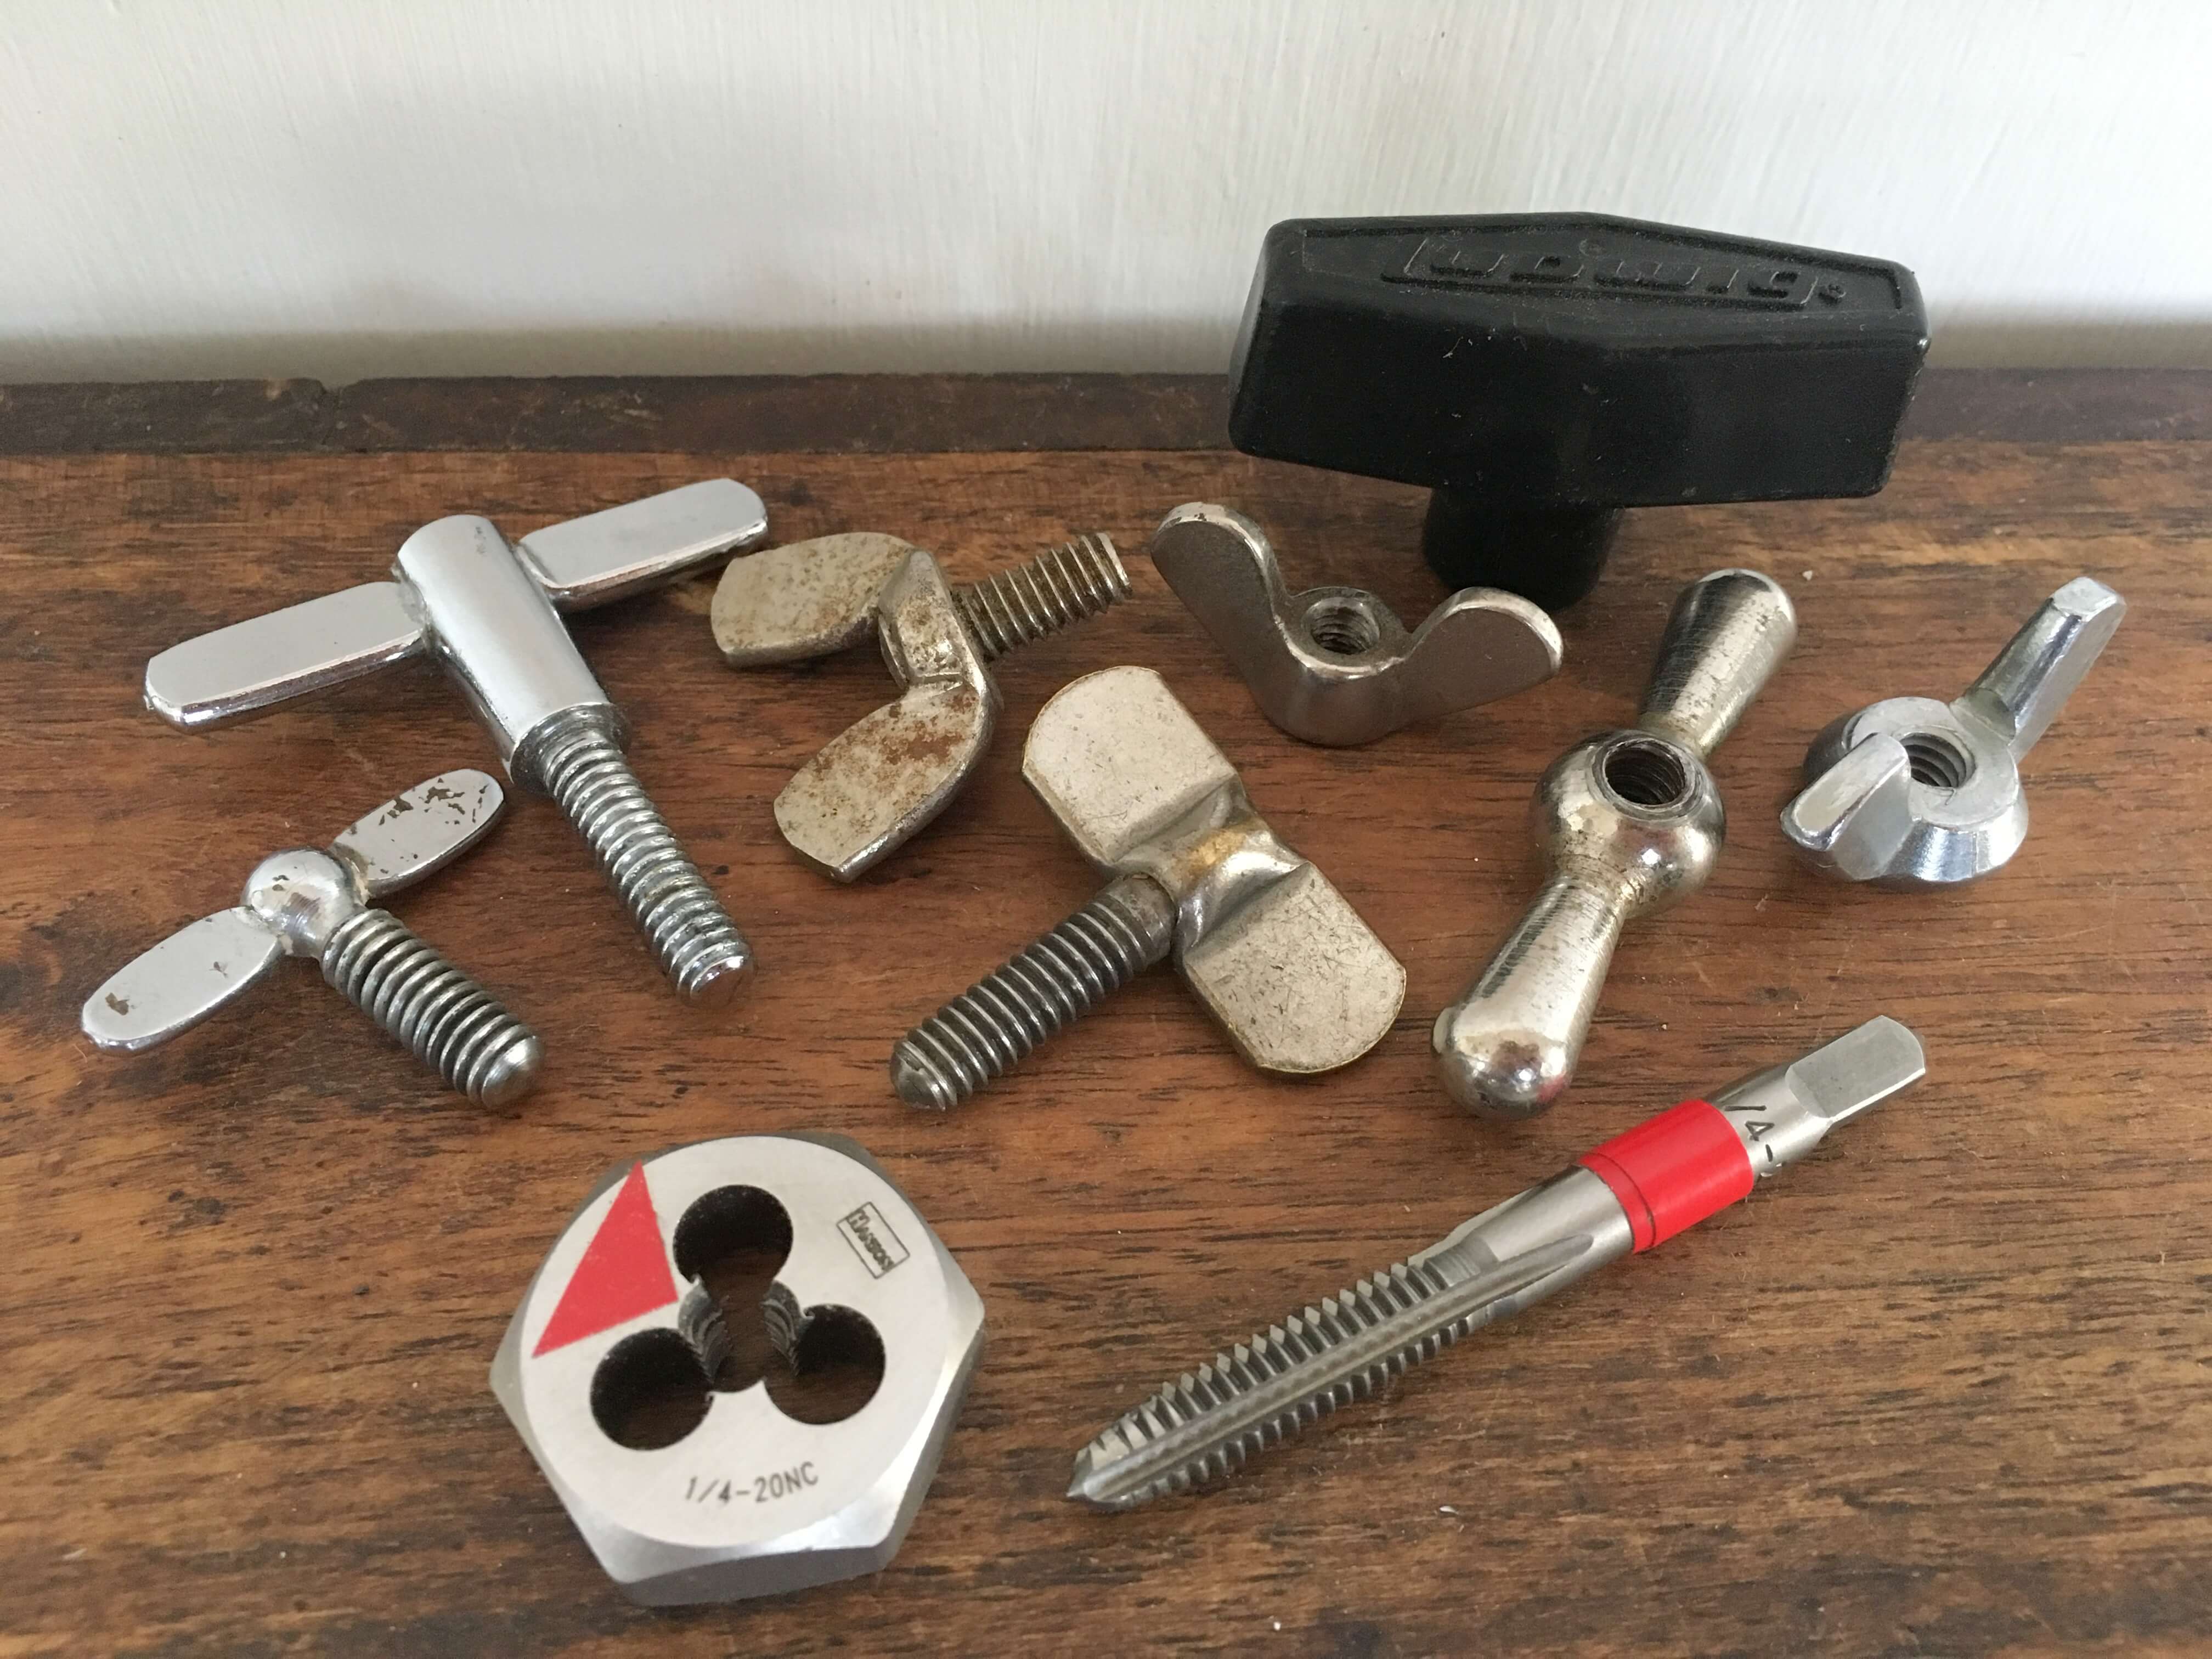
1/4-20: Common Vintage Drum Hardware Thread
1/4-20 threads
The 1/4-20 thread can be found on all sorts of drum hardware made before about 1980. From stands to clamps to brackets, it is by far the most commonly used thread count from the vintage era. Every brand made a lot of 1/4-20 parts, which makes it fairly easy to mix brands when repairing vintage drum gear.
These days it’s pretty rare to see new drum equipment produced with this thread. It is however still a standard for photography gear, in particular camera tripod mounts.
This thread holds up rather well and plenty of vintage examples exist. It’s a good idea to keep a stockpile of them for restoration.
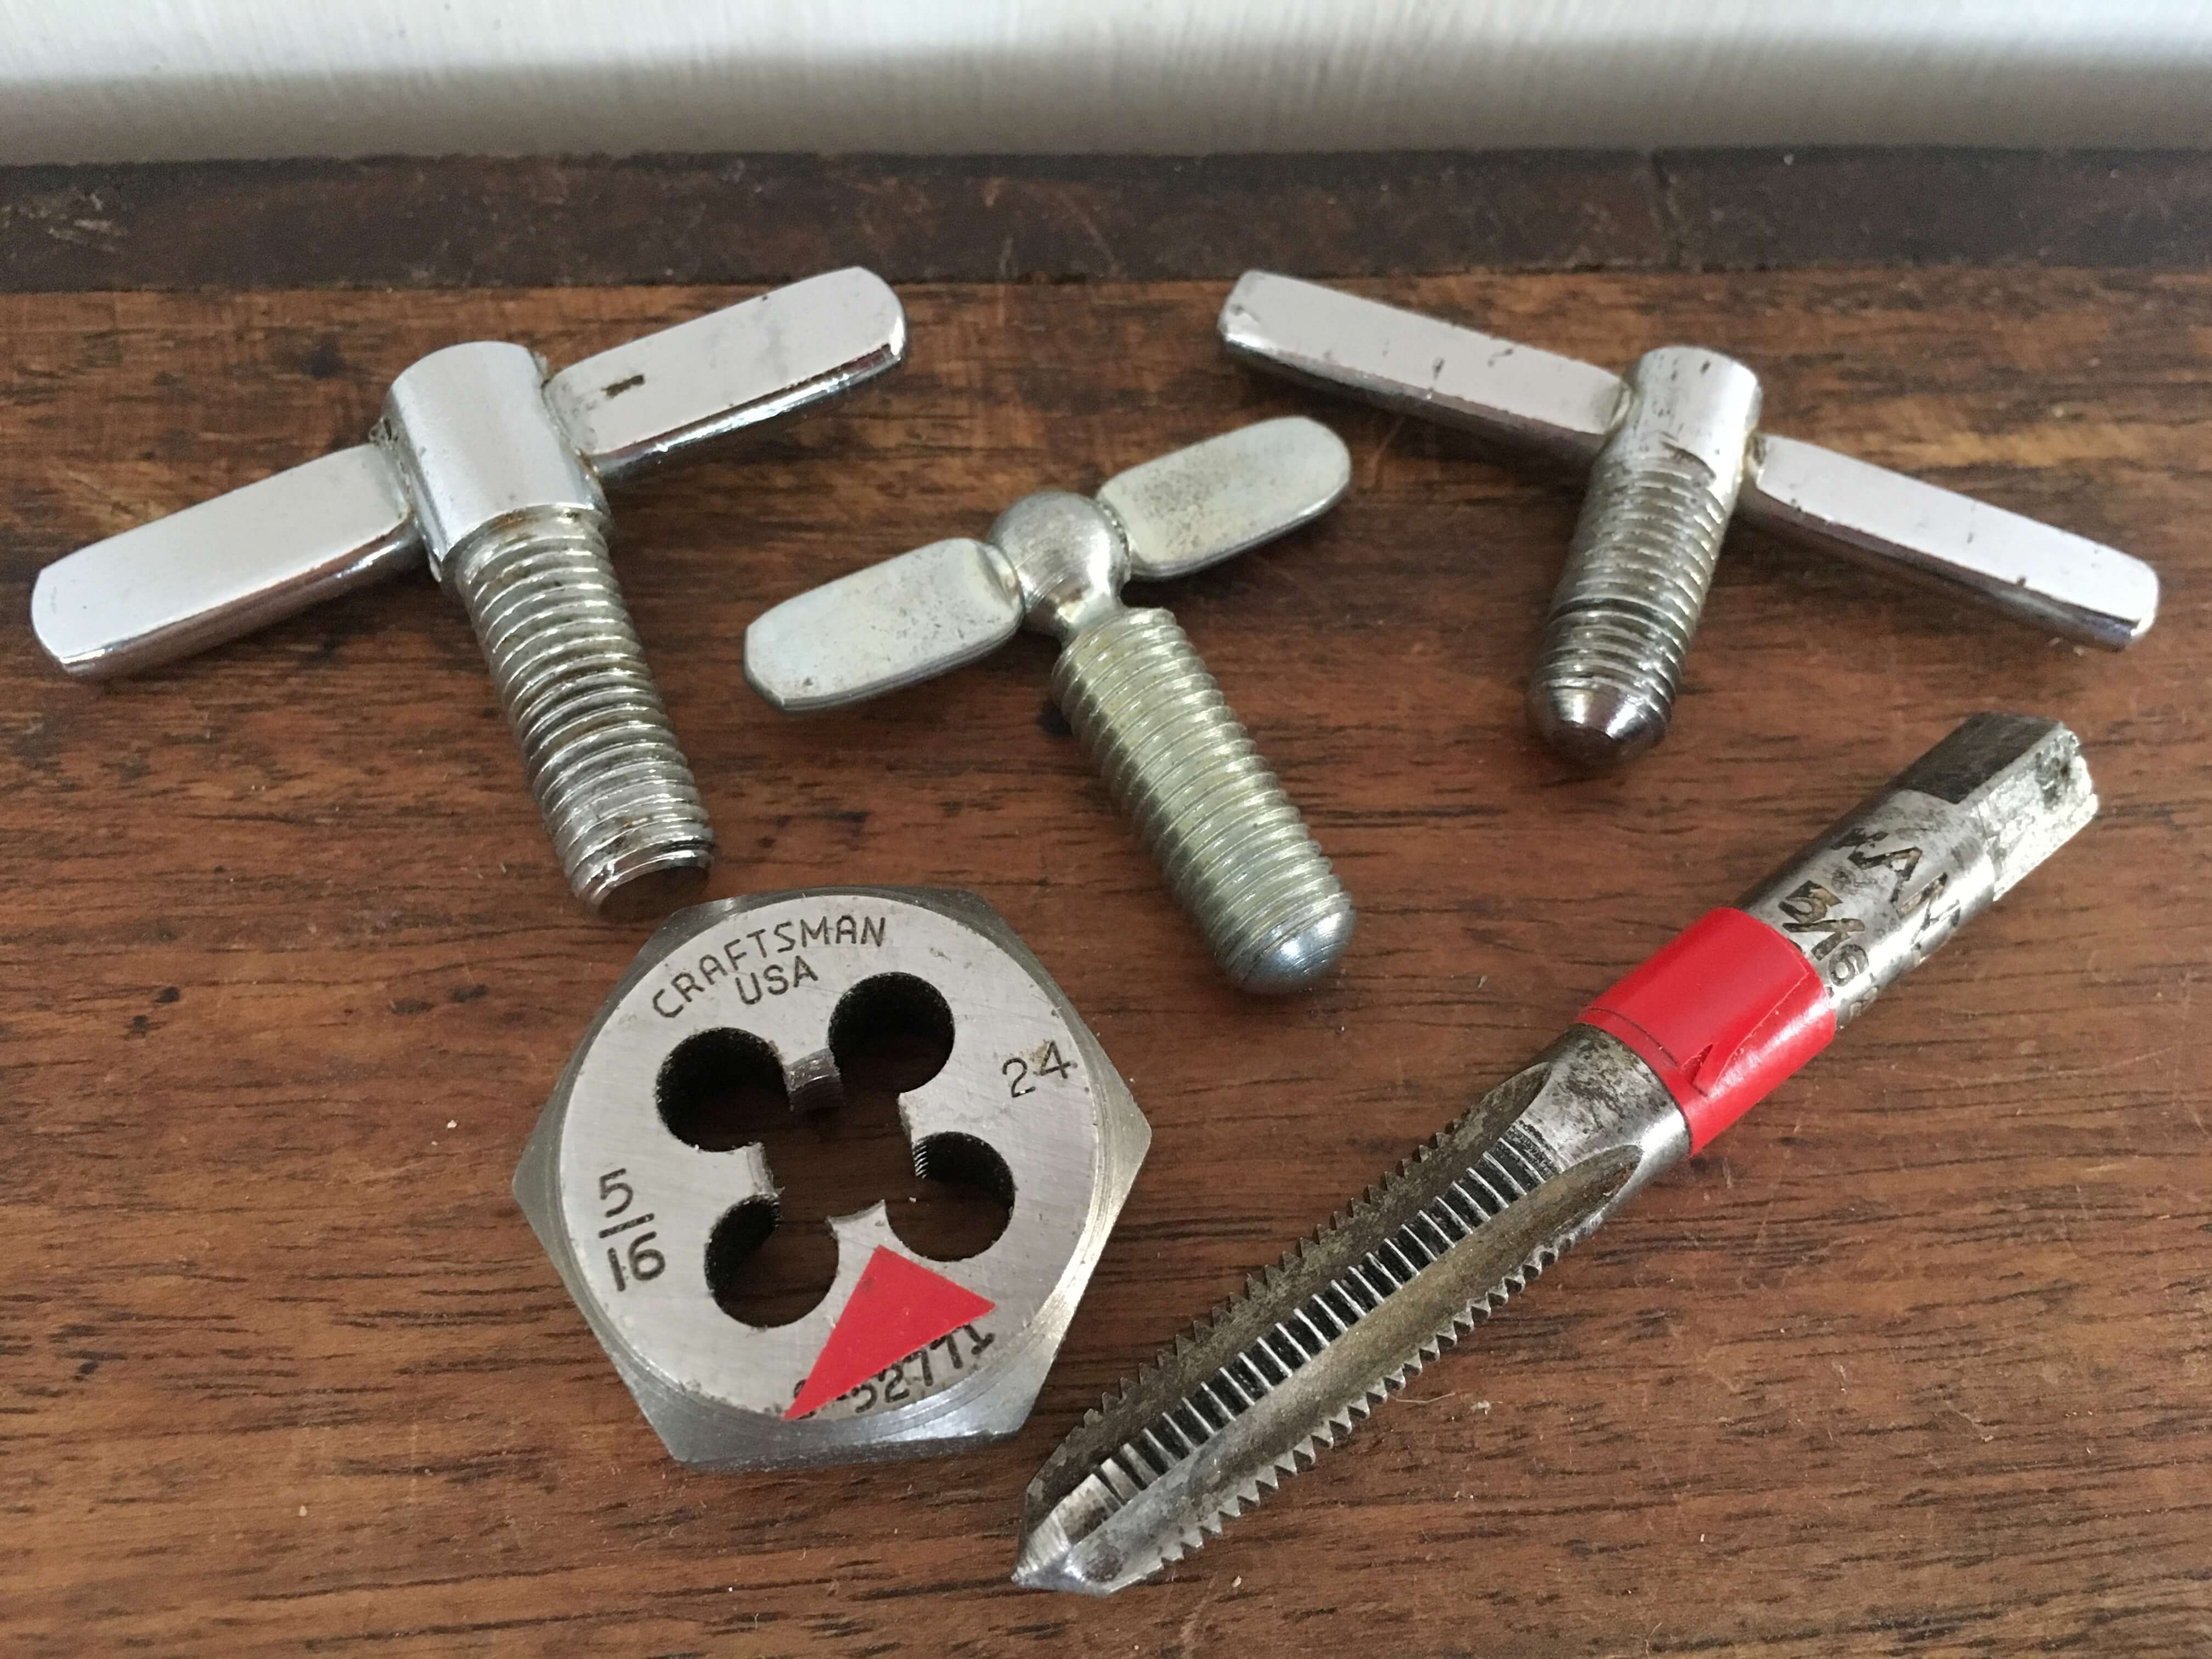
5/16-24: The Stripped Bolt On Your Gretsch Bracket
5/16-24 thread
The 5/16-24 thread is less common but was used for many years by Gretsch and Slingerland, and on the Ludwig Speed King pedal. The picture above shows, from left to right: a Slingerland floor tom bracket bolt, a Ludwig Speed King bolt, and a Gretsch diamond bracket bolt.
The tight thread count, combined with the high torque applied to floor tom leg brackets, has led to a ton of stripped parts over the years. As a result these bolts in good condition are at somewhat of a premium now.
Gretsch used this thread from the Broadkaster era up until the Techware era, most noticeably on their diamond-shaped floor tom and cymbal arm brackets.
Slingerland used this on their floor tom brackets when they replaced the push-button style with the wing bolt style in the early 1960s. Their cymbal stands in the 70s also had these on their lower tripod sections.
The wing bolts on Rogers Swivomatic “swan leg” stands are usually this thread.
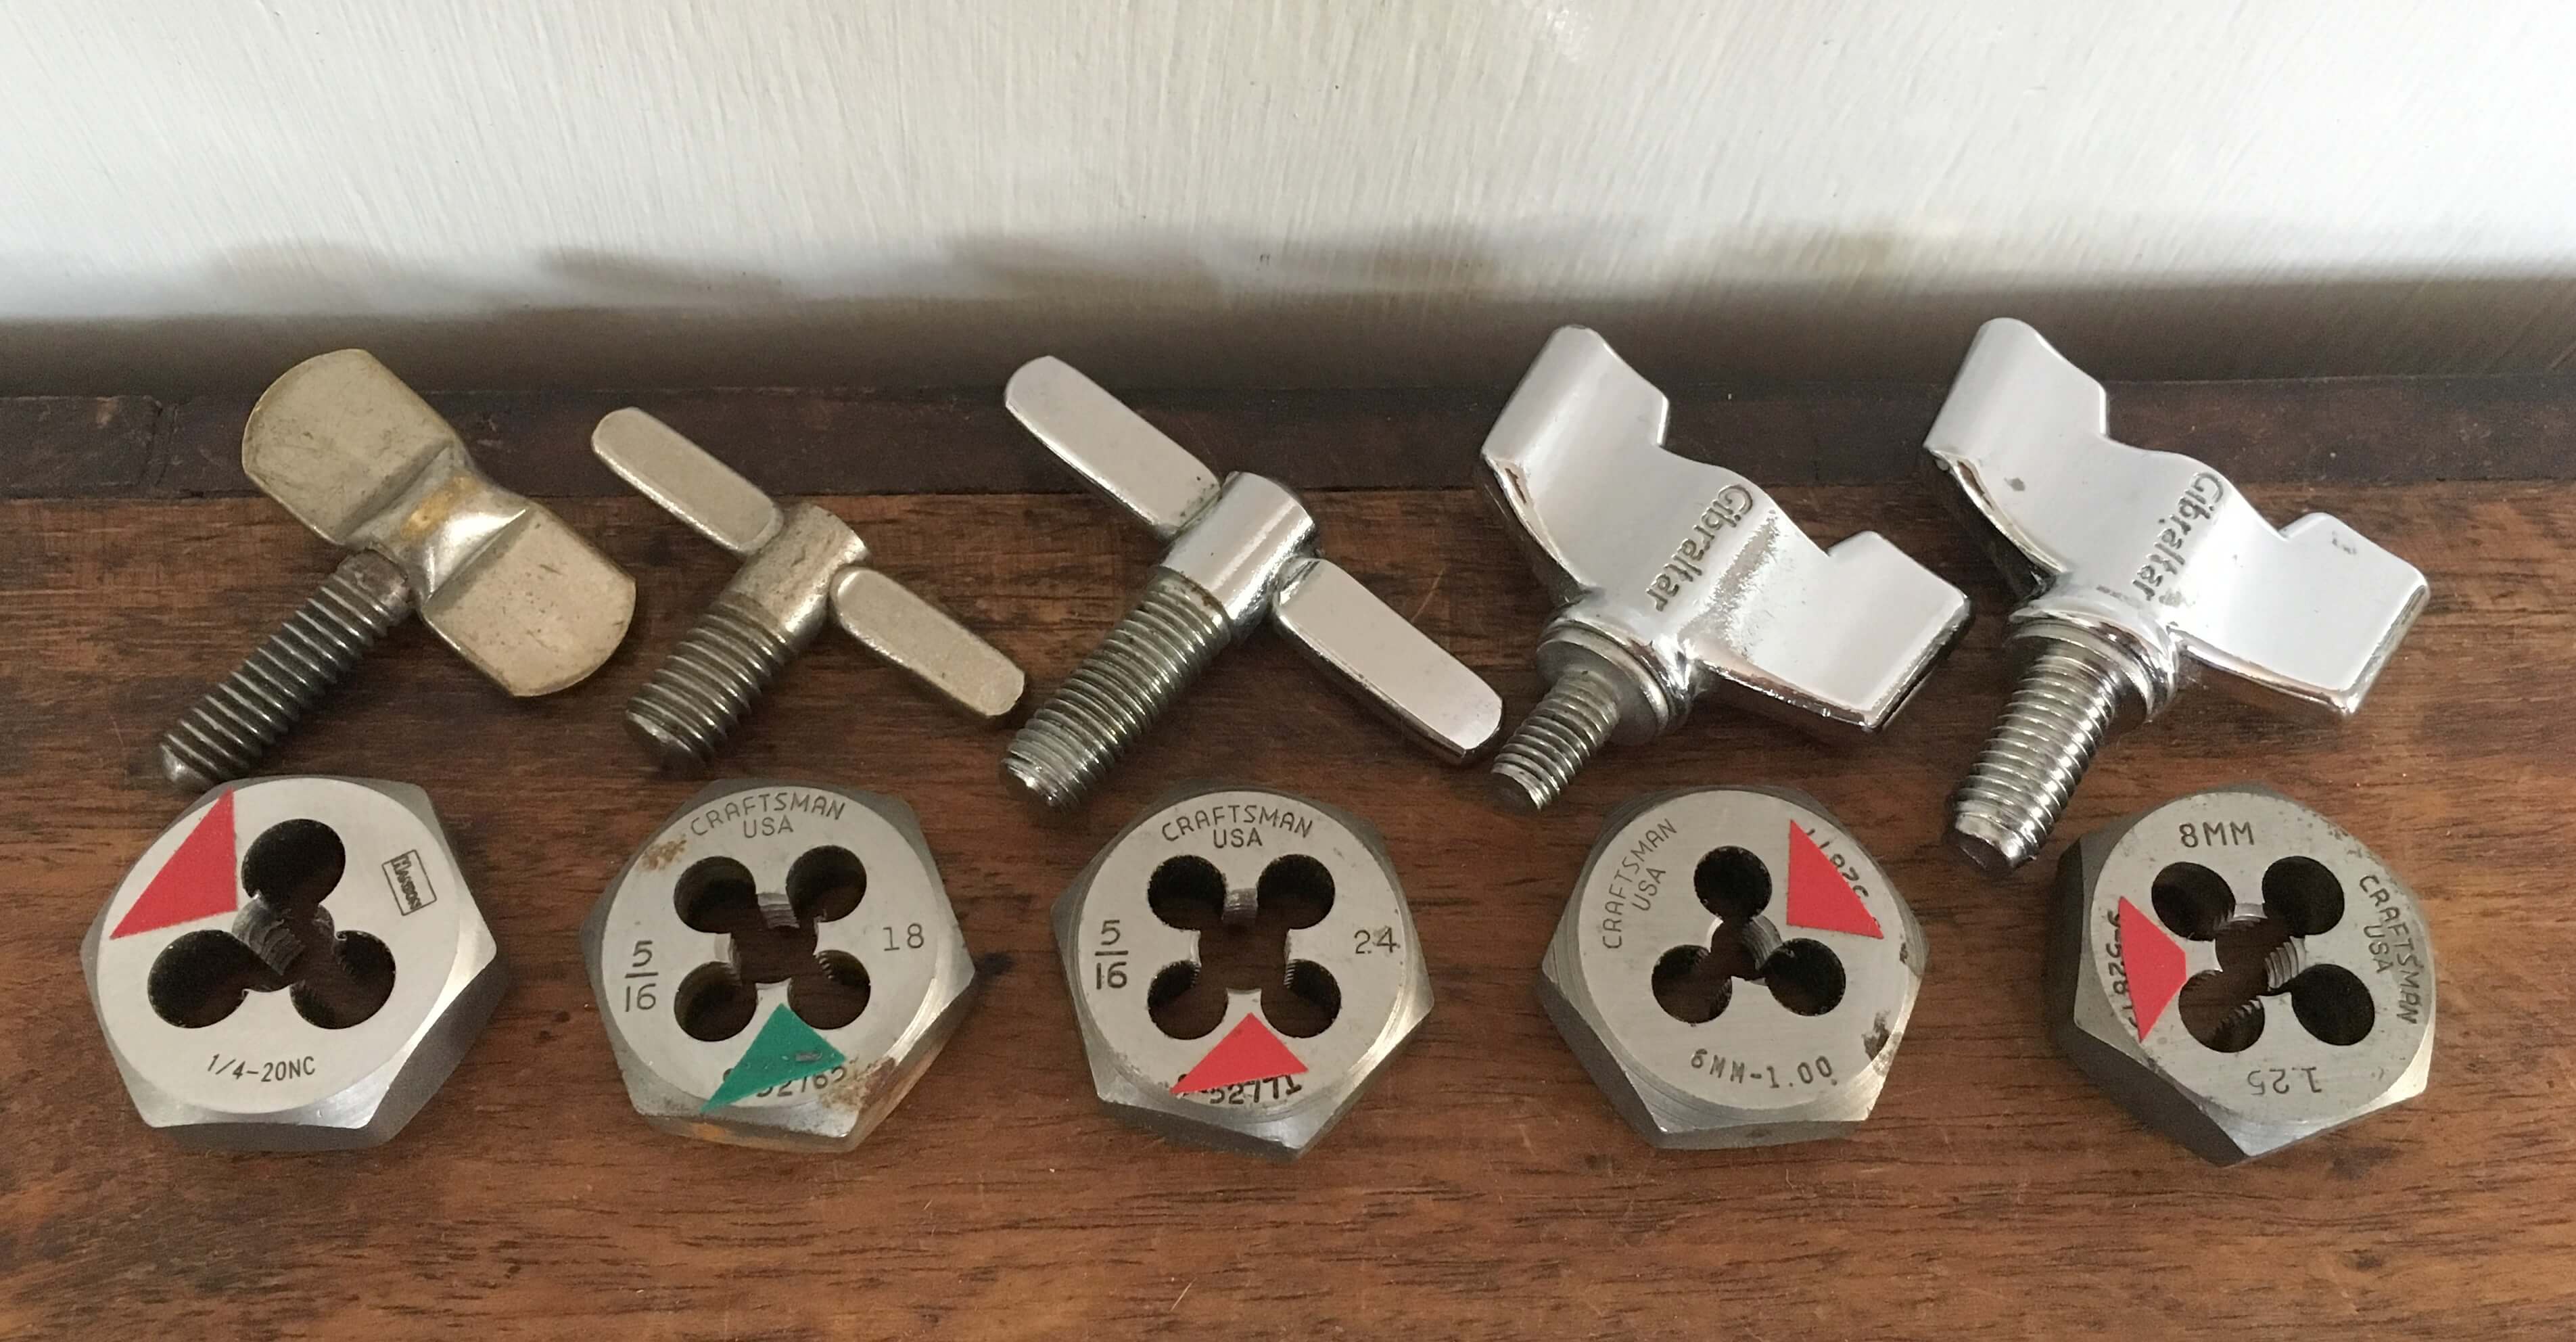
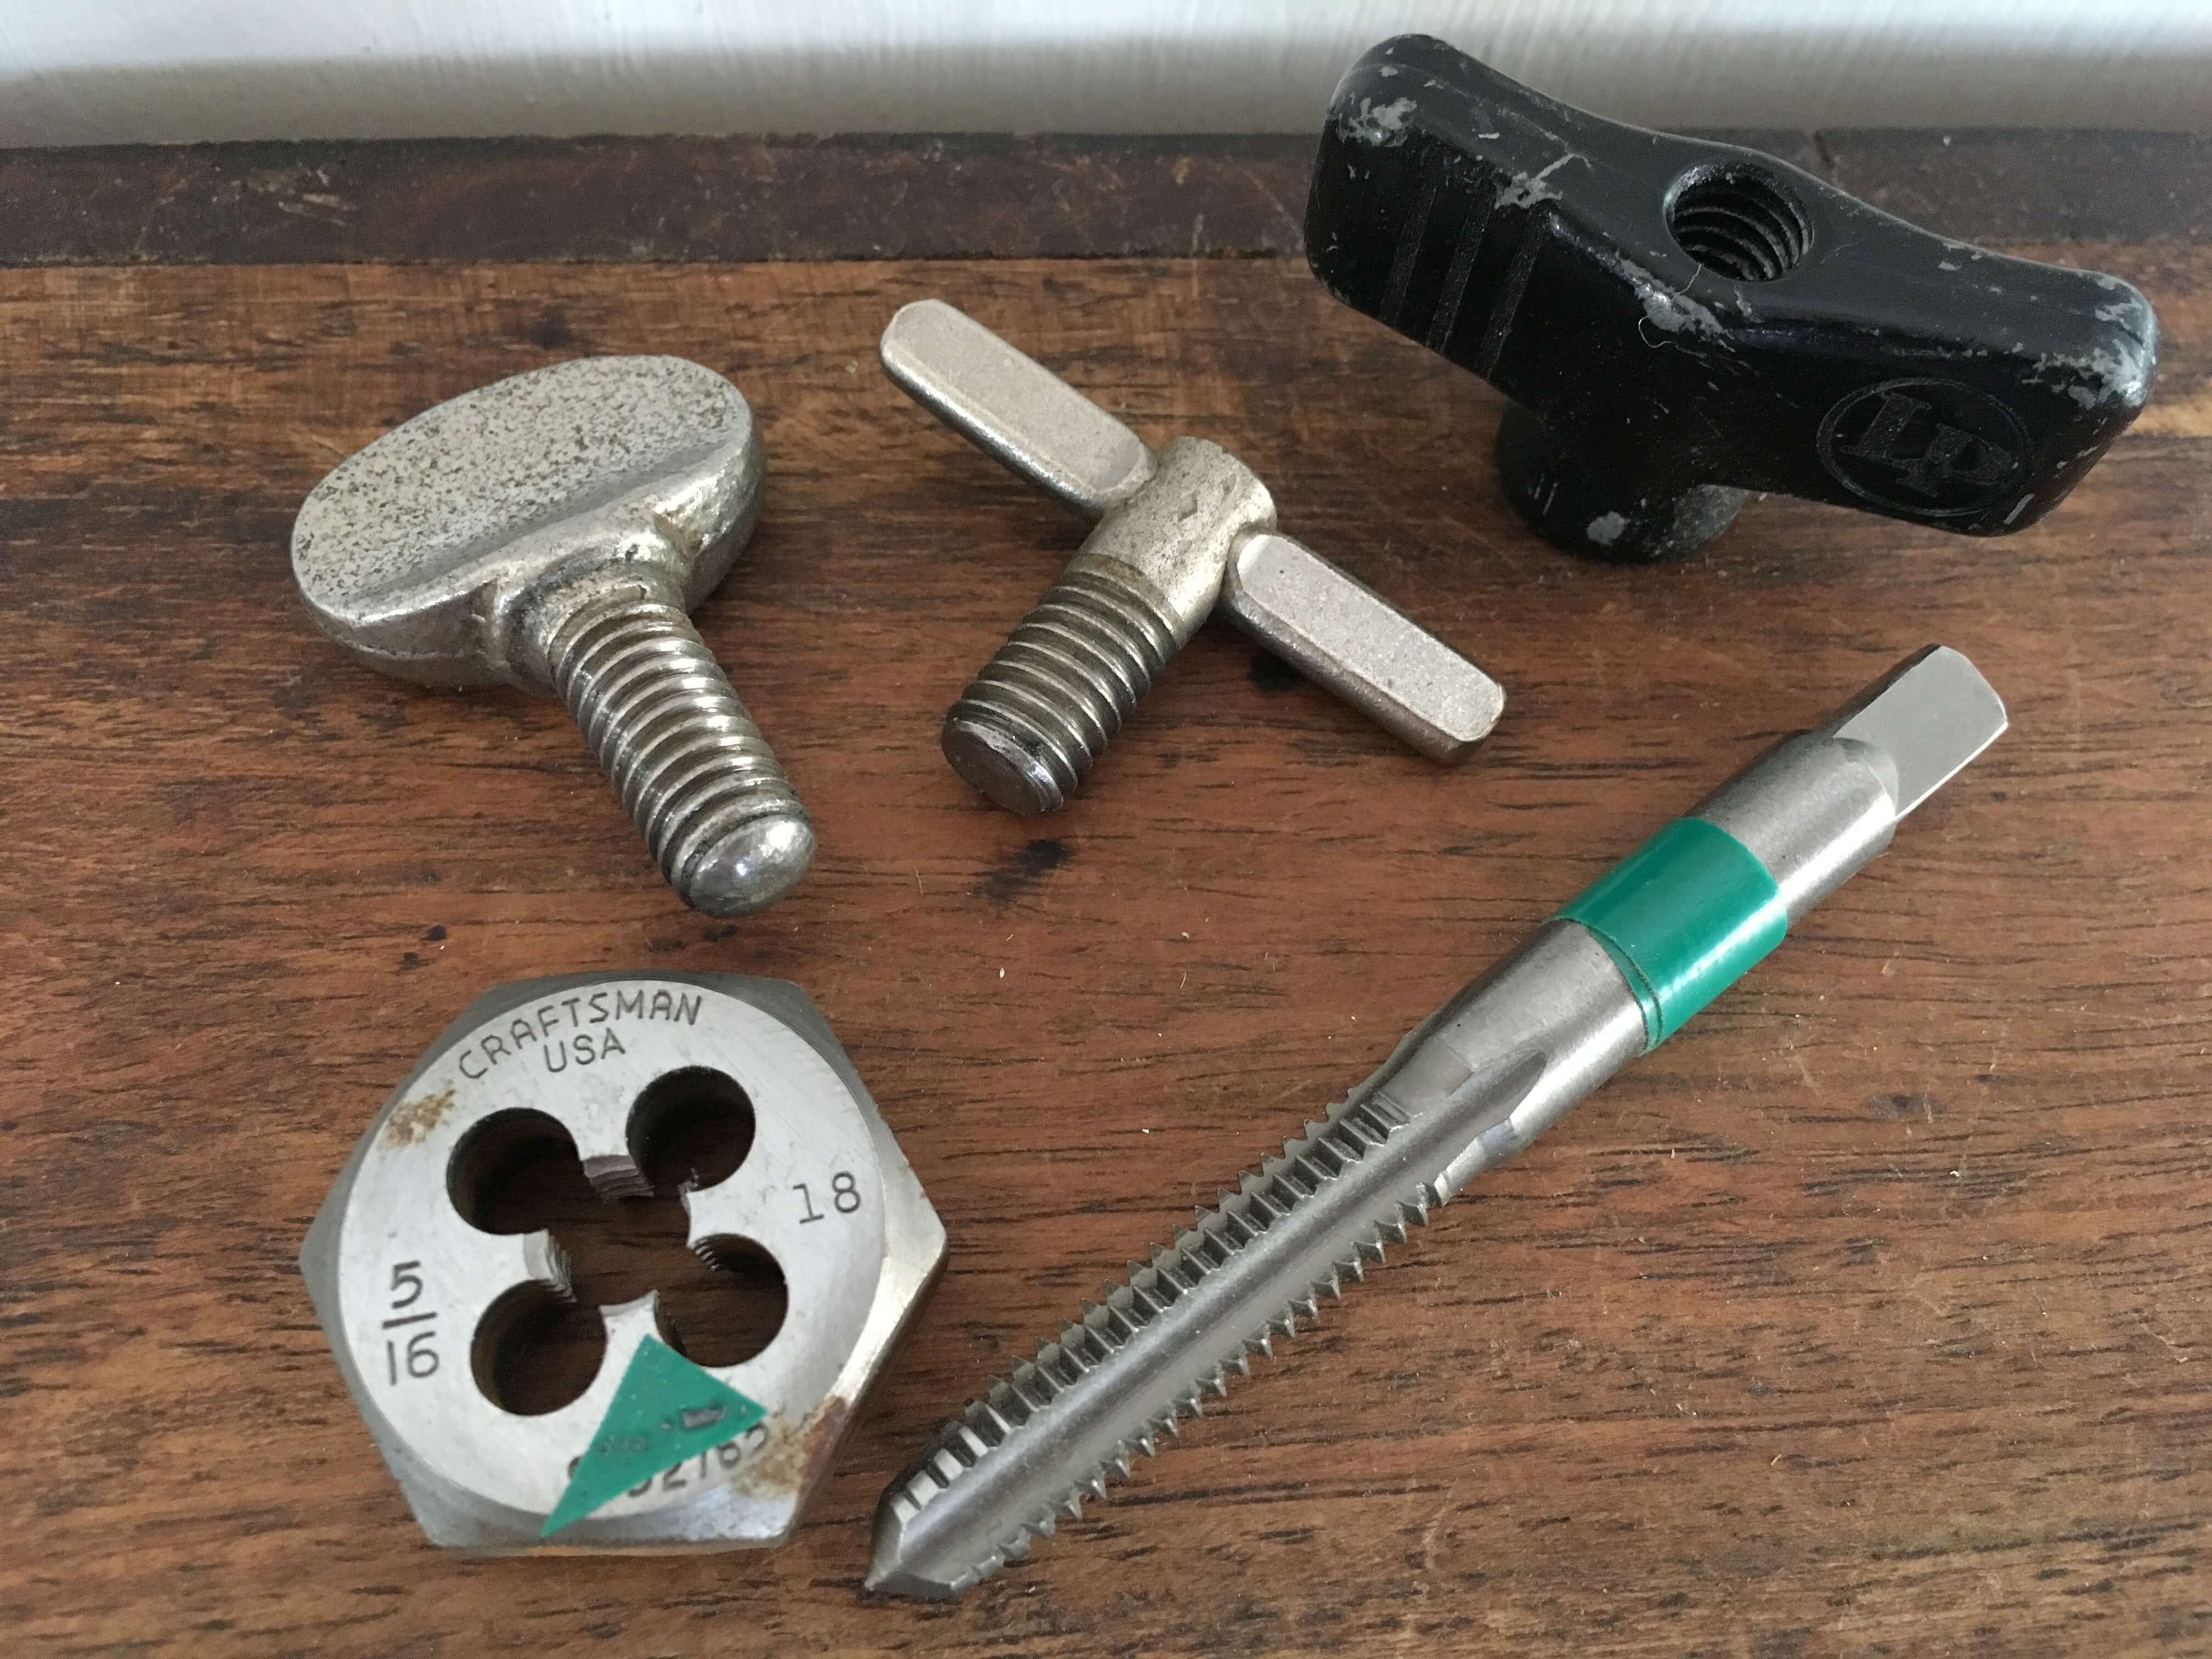
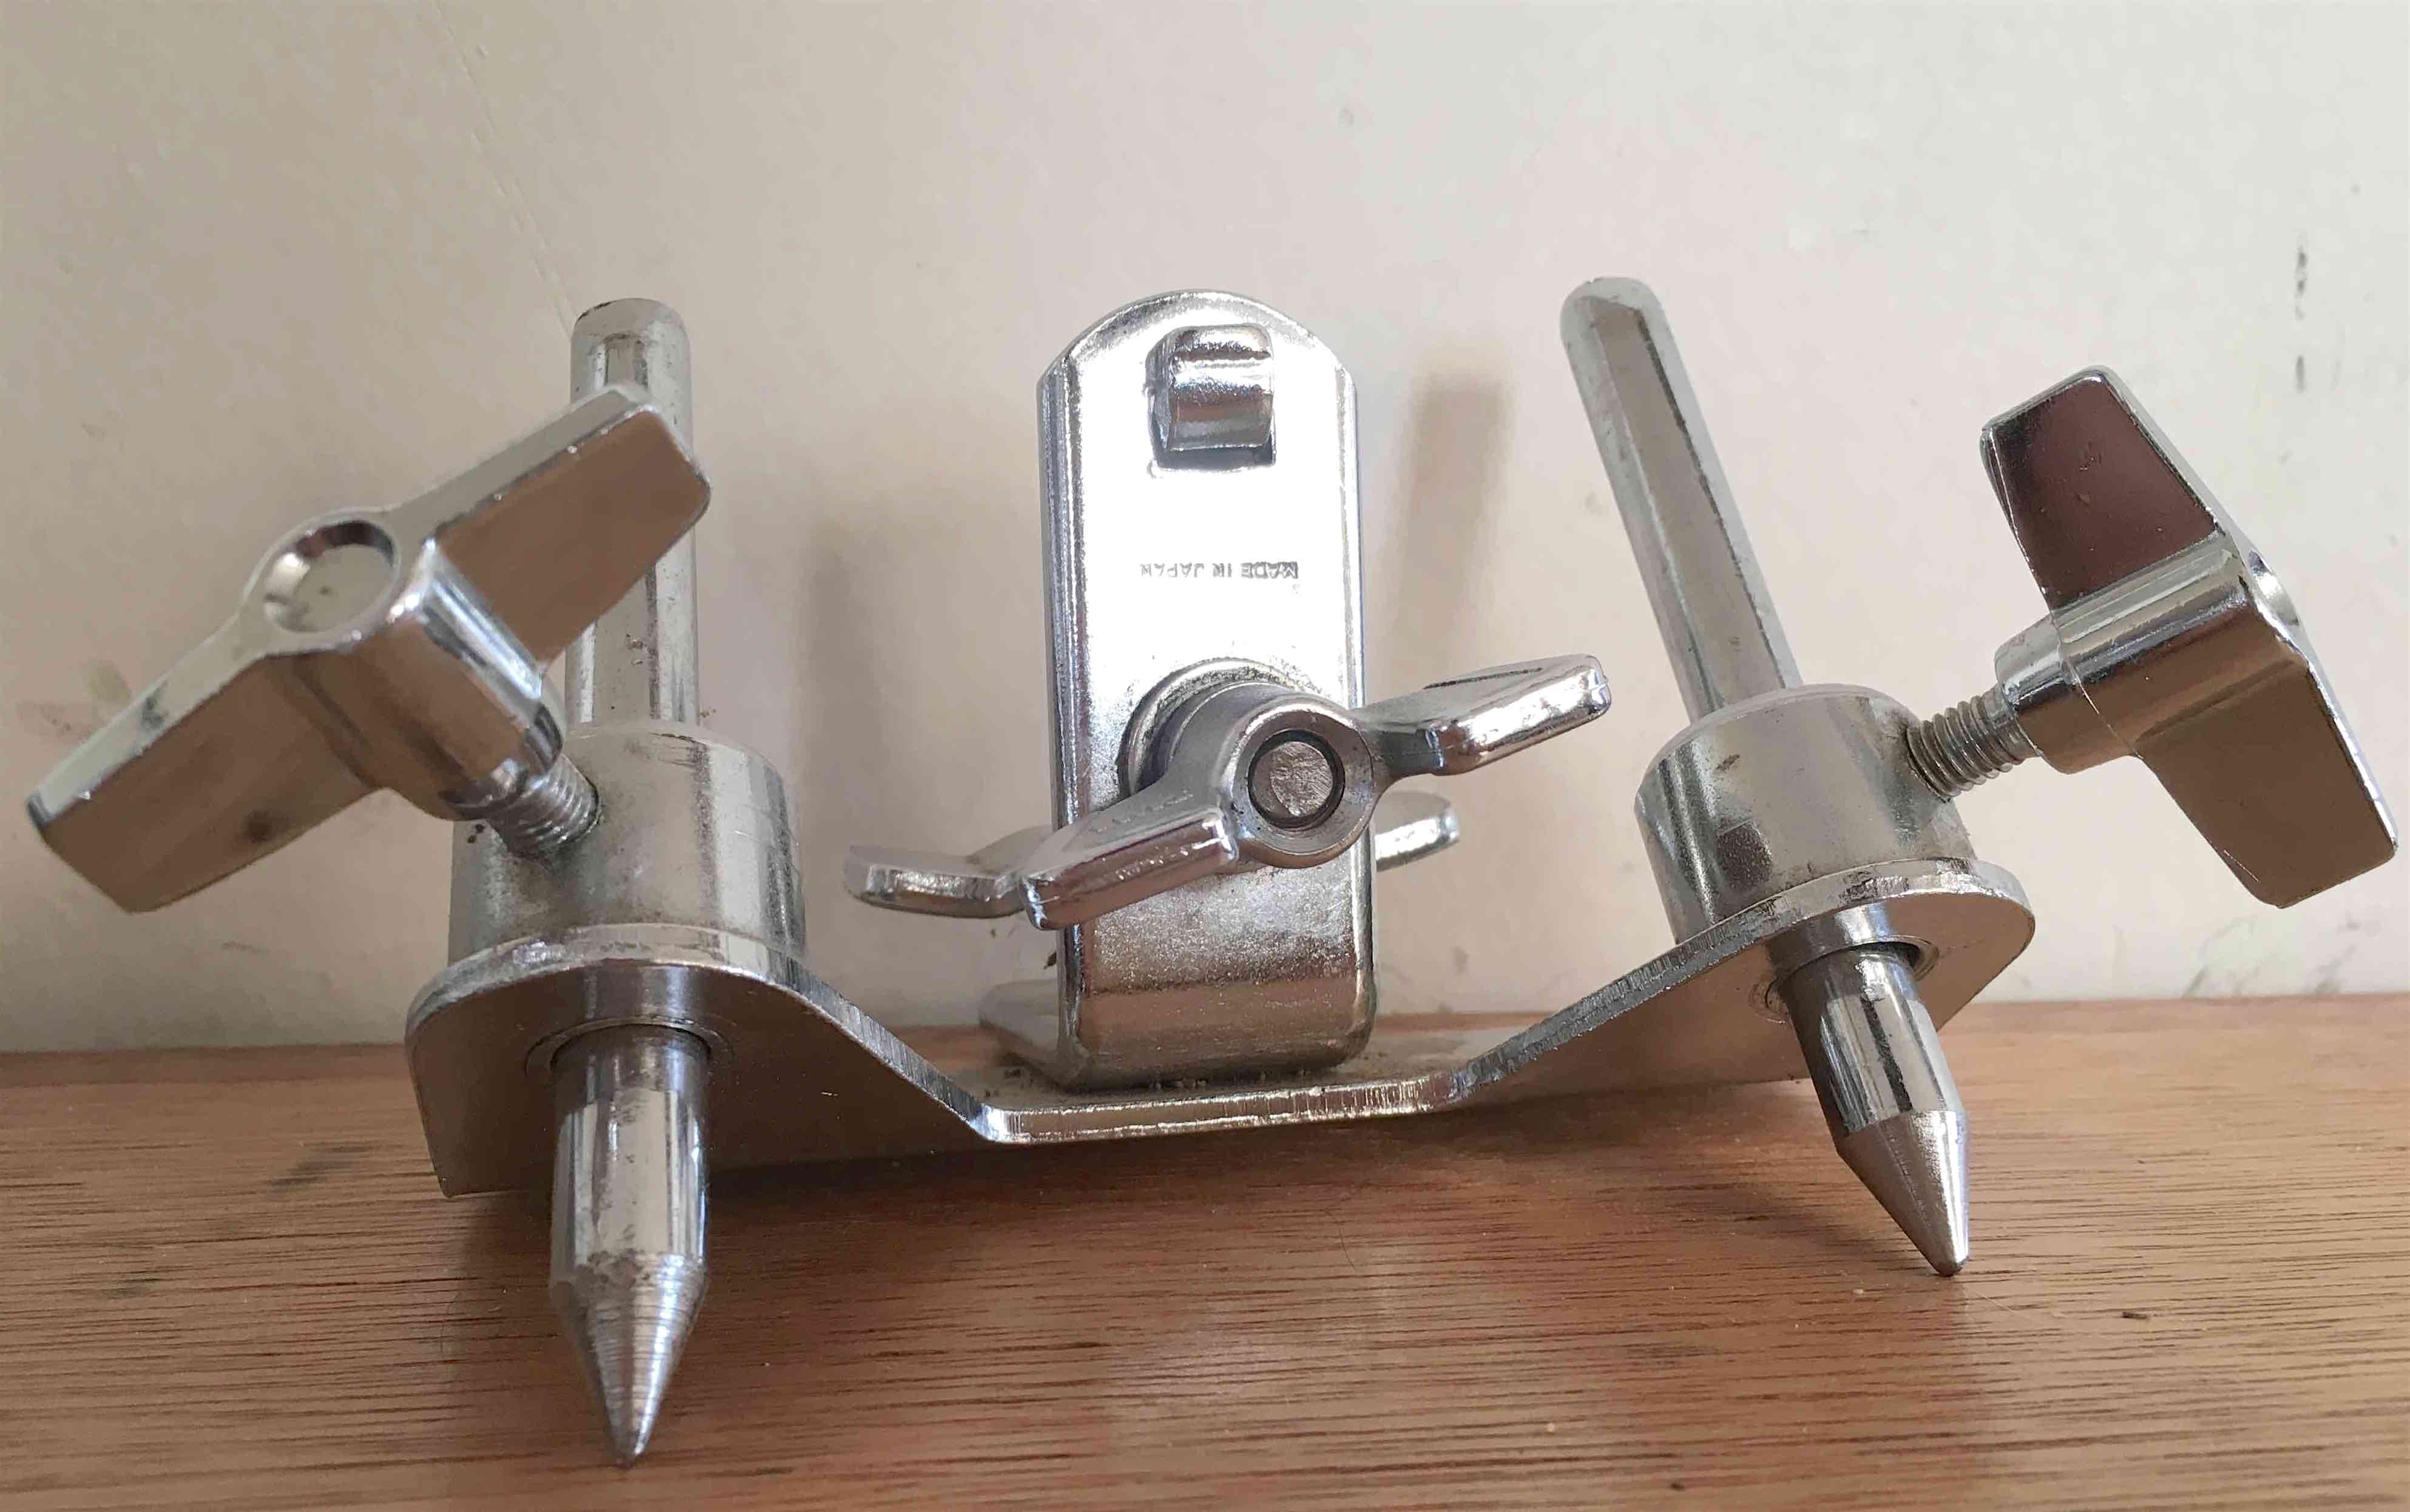
5/16-18: Pedal Clamps, MIJ Brackets and Others
5/16-18 thread
The 5/16-18 thread is a common standard of modern hardware stores. It is less common in the drum universe but worth noting here. It looks deceptively like the 8mm modern thread (see below), which can be frustrating and lead to damage by trying to thread a more common part into a 5/16-18 receptacle or vice versa.
This thread was used on a lot of vintage bass pedal hoop clamps, notably Camco and Gretsch’s “Floating Action” pedals. Drum Workshop continued using it decades later when they made the DW5000 based off the same design, and have continued even as they designed their own branded wing bolts.
Many Japanese drum makers in the 60s and 70s used this thread on shell-mounted hardware such as leg brackets and tom post holders. Often these bolts had square drum key heads.
Latin Percussion continues to use this thread on a lot of their clamps and small utility hardware.
Ludwig has commonly used this thread on their 1216 and 1610 brackets. Their Consolette rail mounts (as well as other rail mounts) utilized 5/16-18 thread on the hex nuts and carriage bolts.
8mm-1.25: Large Modern Drum Hardware Thread
8mm-1.25 thread
The 8mm-1.25 thread has been the standard for modern drum hardware since around 1980 or so. It’s a full-sized thread that holds up well and it’s on pretty much everything, from shell hardware to stands to clamps.
Almost every pro brand uses this thread as a standard. LP is an exception, and DW still uses the more coarse 5/16-18 thread on some hardware as noted above.
The tops of most modern cymbal stands use this thread which means that many vintage cymbals, which were designed for use with 1/4-20 tilters, will not fit on such stands.
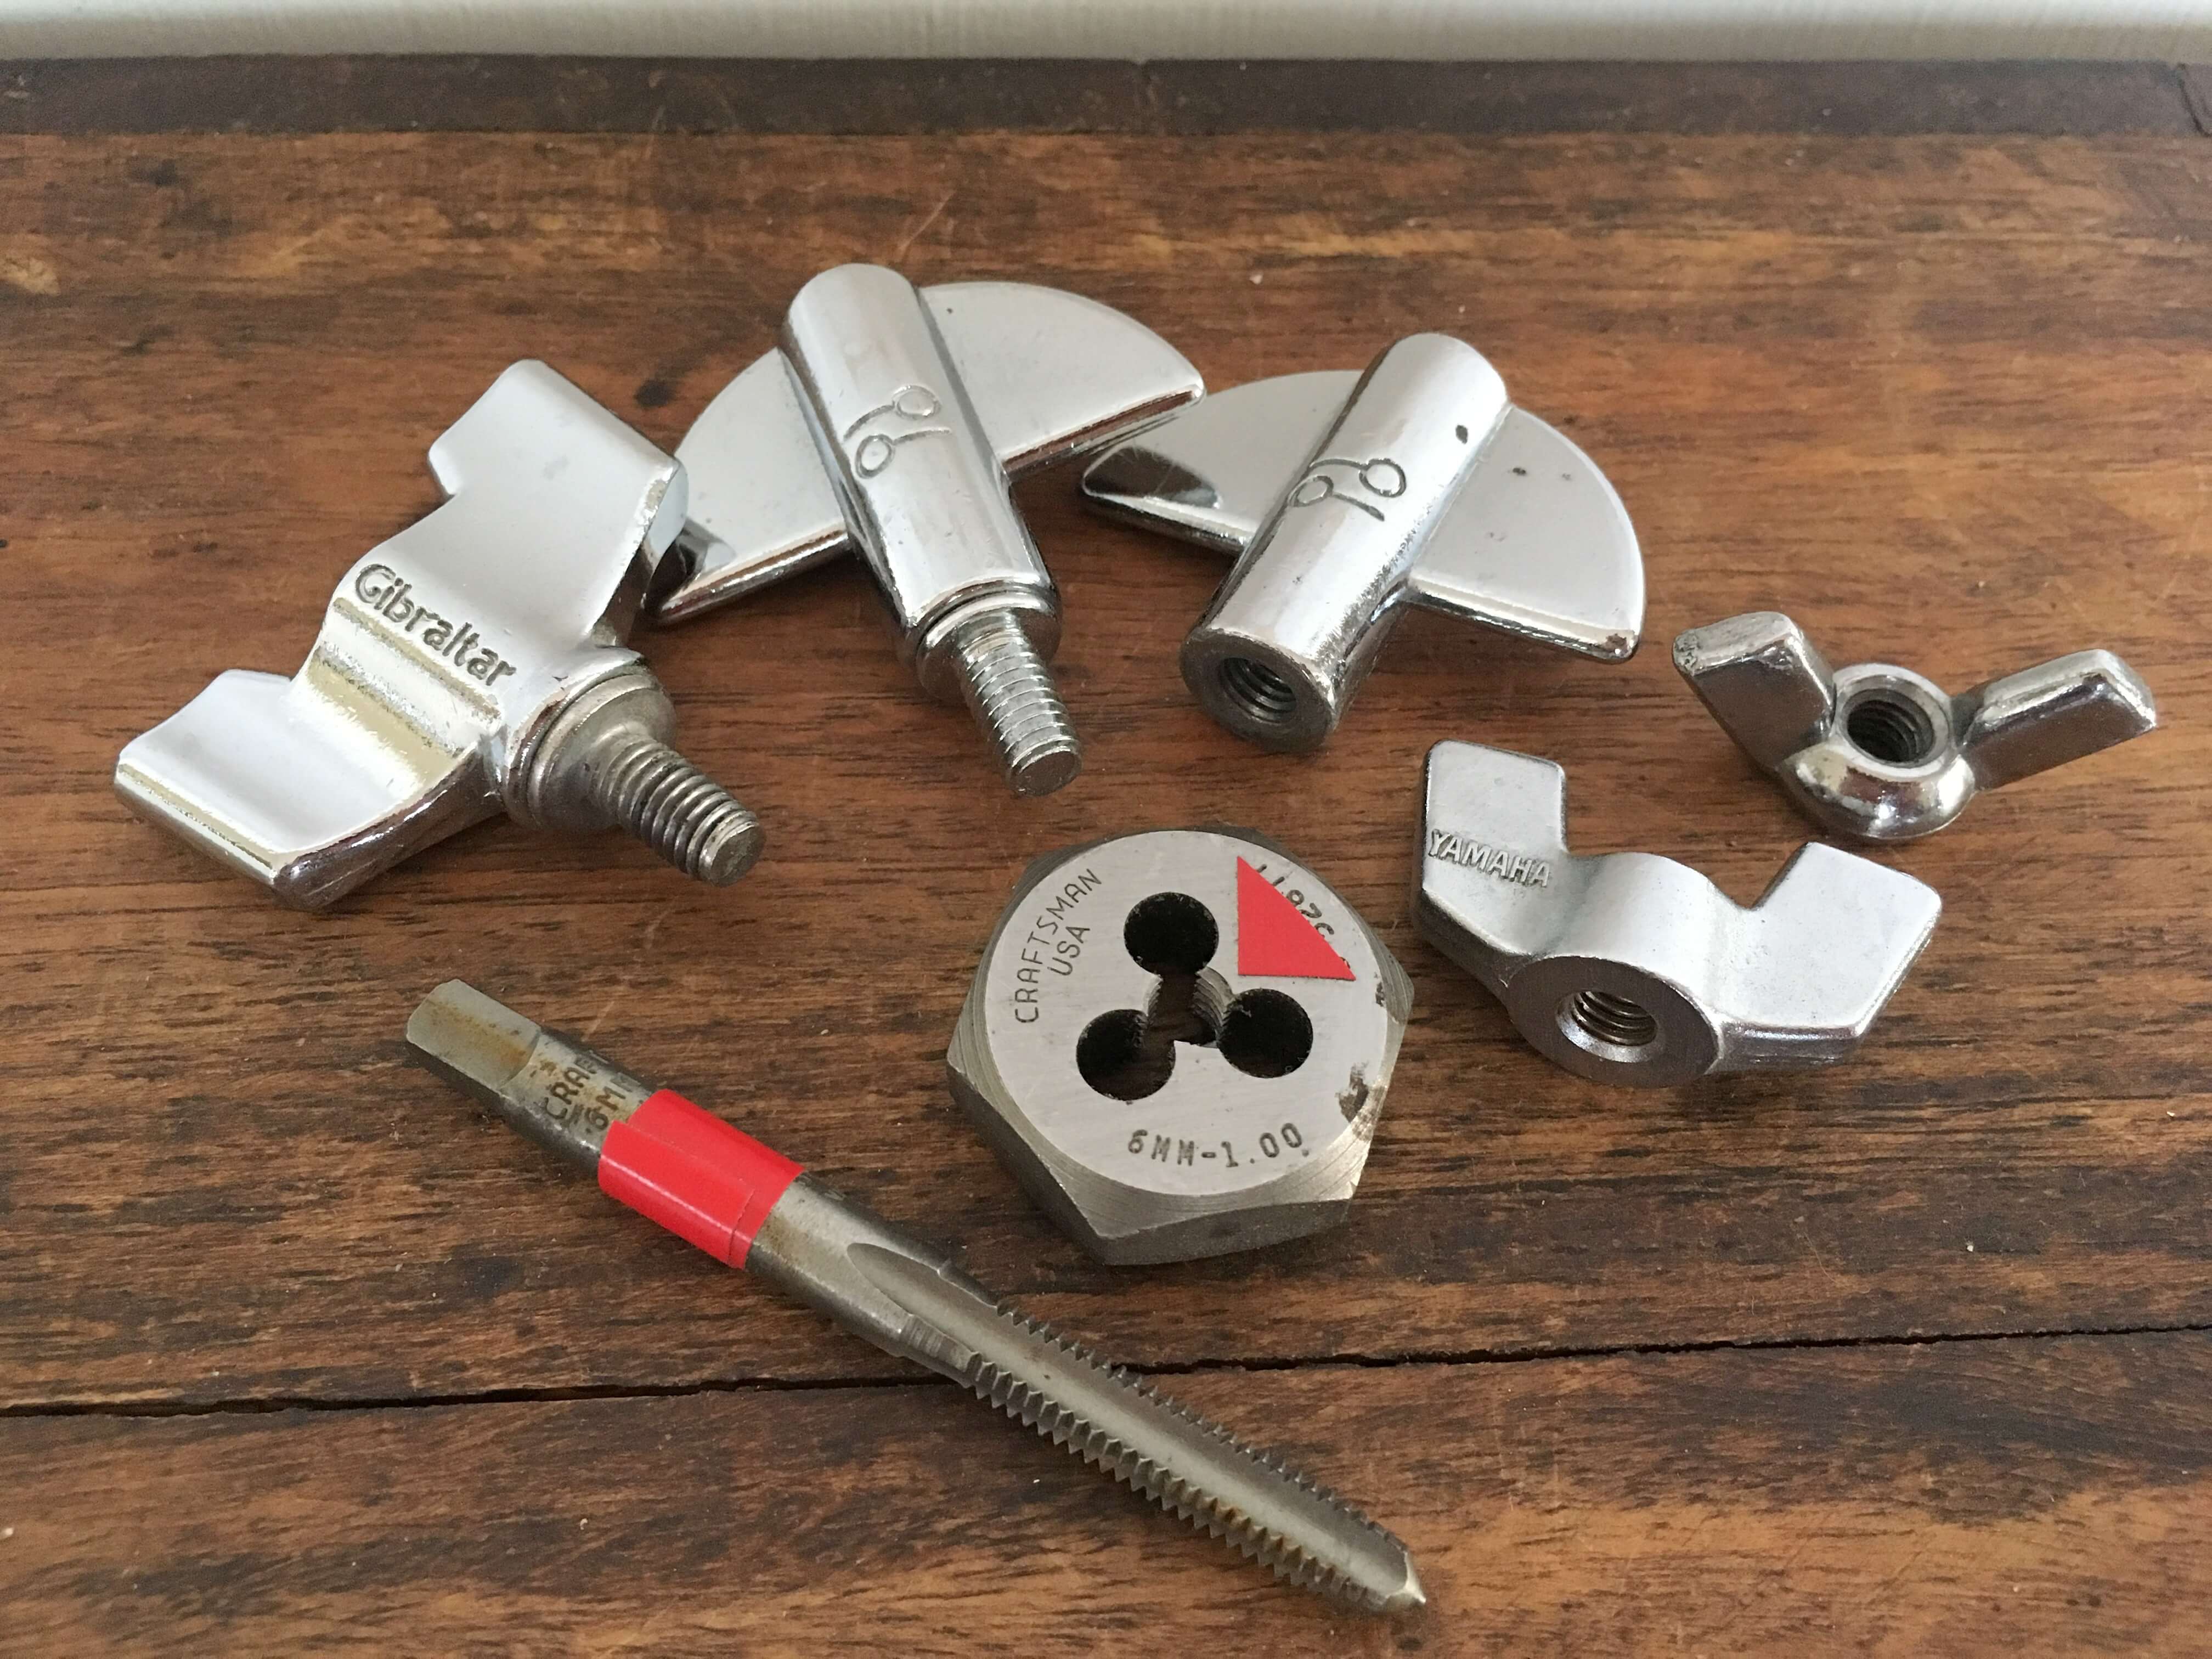
6mm-1.00: Small Modern Drum Hardware Thread
6mm-1.00 thread
The 6mm-1.00 thread is also very common on modern drum hardware and is often used where less space is available and an 8mm bolt or housing wouldn’t fit. Or sometimes it’s simply used as an alternative to the larger diameter thread.
6mm-1.00 is sometimes a hallmark of less expensive hardware; for instance student-level cymbal stands will generally have 6mm tilters.
As the thread count is tighter than the common 8mm thread, these parts are more prone to stripping and/or cross-threading. Fortunately it’s easy to find generic wing nuts (such as the one on the right in the above photo) at most any hardware store. Wing bolts are more of a specialty item.
Other Threads
There were many small wing bolts and thumbscrews of assorted thread counts and diameters used in the traps era, and in general before about 1960. I have dozens of these laying around in my parts bins and they’re difficult to reuse for anything else as there wasn’t much standardization. The larger bolts were much more standardized, fortunately.
In a future post I hope to cover different tension rod threads, which were always separate from wing nuts and bolts.
1960s pre- paper tag era, 6-ply with silver sealer, original red sparkle wrap. All have factory edges, and all parts are 100% original.
Condition report:
8×12: no extra holes, edges are super clean. Seam has been glued with what might be Elmer’s glue, it flakes off easily. Some rash on one side. Rims have some wear as shown.
14×14: the cleanest of the three, no extra holes, edges are super clean. Had some stickers on it at some point, in the right light the wrap fade around these can be seen but it’s subtle. Rims are very clean. Non-original legs from the same era.
14×20: had a Set-o-Matic bracket installed and then moved at some point, numerous extra holes as a result. One hoop is from later in the 60s and has a crack pinned and repaired, and some touched up paint. Replacement felt on Pratt muffler. Edges are excellent but with a couple of very tiny nicks.
I had a long day at the workshop on Sunday and was able to finish two back burner projects I’ve had sitting around for what feels like ages. A blonde Round Badge 12/16/20, and a Leedy & Ludwig/Slingerleedy 13/16/20. Here are some photos:
Gretsch Blonde RBLeedy & Ludwig
They both had been just waiting for bass drum hoops to be finished, basically. Both these drum sets had been posted in the past but I pulled them down to do a little more work. The Gretsch needed more coats of lacquer and natural hoops, and the L&L needed proper hoops with matching inlays. And correct spurs, which I compromised on and decided to use chrome Radio King brackets.
Both are as of this writing now up on eBay and/or Reverb and/or here in the shop section.
Among occasional other items, I sell drum parts on eBay. Depending on the week I might ship as many as 40 items to buyers all over the world. My eBay account has been around since before digital cameras were a thing, with a spotless record.
I buy a lot of things on eBay too. I’m constantly browsing, looking for deals and underpriced items in the percussion section. And I see a ton of people making obvious rookie mistakes in their listings, throwing their time and money away. In some cases, I can tell at a glance that people are just asking to give away their items for basically nothing.
At the risk of empowering my competition, I’ve compiled the following list of my accumulated wisdom for selling on eBay.
Know Your Market
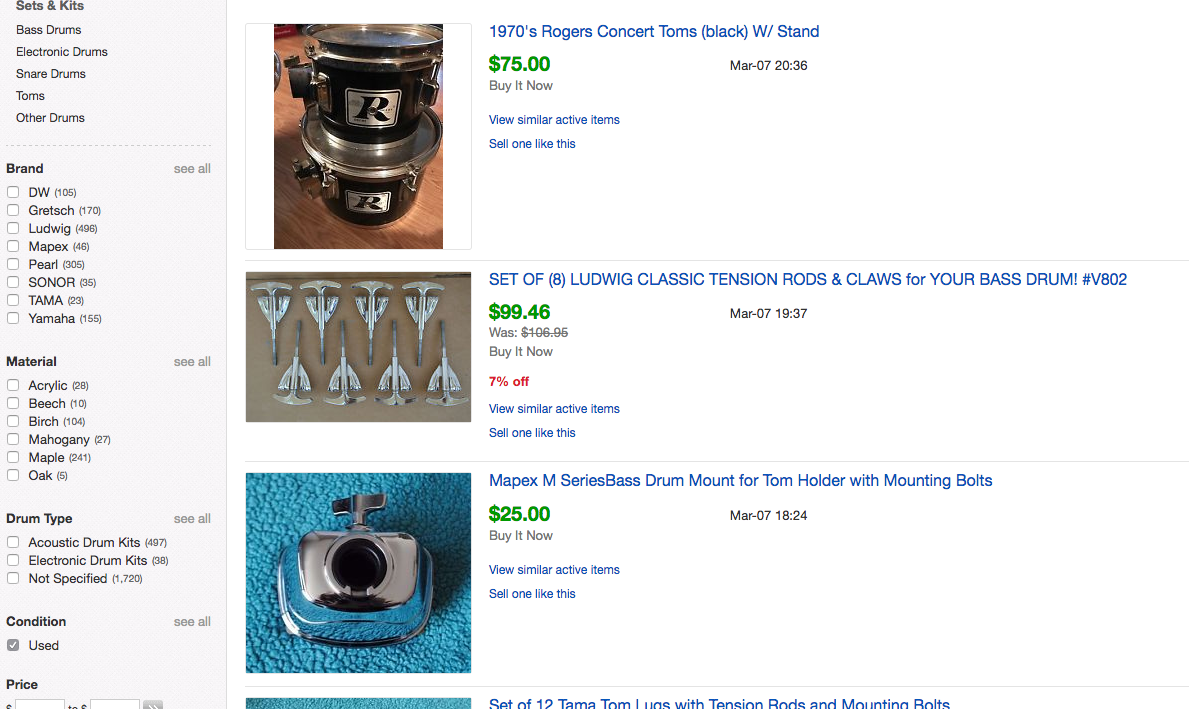
First, know your market. Know whats specific things are worth to buyers. If you only sell once in a blue moon and have no clue about your item’s possible value, just do ten minutes of research. Search for what items similar to whatever it is you’re about to list have sold for.
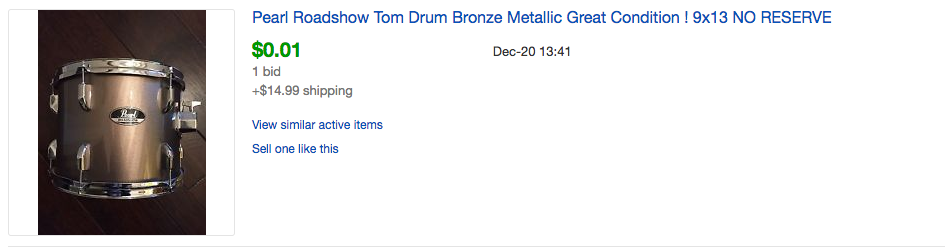
The green price means it sold for that much
On eBay, you can search for what’s currently listed for sale, completed items, and completed successfully sold items. That last one is the most useful for determining what the market will actually bear. Lots of sellers are far too ambitious with their prices, and I think it’s mostly because they only looked at what’s for sale, not what has actually sold. Of course, looking at what’s for sale currently is also important, you have to know your competition. If you have the same part as someone else on eBay, you have to have an edge over them to sell yours. Read on for all the ways to accomplish that…
Know Your Merchandise
I’ve sold some of the strangest, most arcane drum parts items imaginable. I’m able to do this because I know how to name and describe it so that the one person across the country who needs my item can find it.
You must know enough about your item to be able to name it effectively. Brand name is great, if it has one. Model name and number are great too. If you suspect this info is out there but you don’t know it, it may well be worth your time to spend a few minutes looking for answers. There are great forums filled with experts for most topics you can think of, and they’re usually happy to help out and share knowledge. Facebook forums have become a hub of expert niche knowledge in recent years.
One thing I’ve noticed again and again in selling drum parts is that items without a searched-for brand name just do not sell for much, no matter how cool or nice they are. They have lower visibility, which means that I will expect them to sit online for months or maybe even longer until a person in need stumbles across them. However, eBay is incredibly great for connecting obscure items with just the right buyer. And as their selling fees are now well over ten percent when combined with PayPal, they’d better be!
Don’t Waste (Key) Words
Let’s play the name game. eBay searches function (primarily) through the names/titles you give your items, so they are tremendously important. More important even than the subcategory you list in. eBay gives you a finite number of characters for your listing title. It’s quite a few. Use them all if you possibly can.
This is the place where I see people screw up the most. I regularly see listings that look like this:
Short eBay titles are a waste of the free keywords they give you
First of all, recording custom what? It’s a bass drum. Also called a kick drum. What kind of wood is it made from? What era? What size? What is the finish? My title for this listing would probably read:
Yamaha RECORDING CUSTOM 80s Vtg Bass KICK DRUM 16×22 Maple Blonde Lacquer Finish MIJ Japan
No need for complete sentences. I’ve used all the characters allowed, more or less. I’ve capitalized the most important words in the title. I’ve also used the abbreviations “MIJ” for “made in Japan,” and “Vtg” which is short for vintage (and will show up in a user search for the term “vintage.” Neat huh?
Oh, and don’t use words like “L@@K” or “NICE!”, they only detract from your description and take up keyword space. Brainstorm more, and put in some useful words. Don’t keyword/brand name spam, eBay often removes those listings.
You Must Take Good Photos
I probably should have put this first on my list. Taking good photos is so important. It signals to people viewing your ads that you’re not a fly by night operation, and it can reveal so much about your items that it will save you time describing them in text.
Fortunately, it’s easier than ever. I used to use an expensive Canon DSLR to take all my eBay photos. But now my iPhone 6s takes better photos than any point and shoot camera I’ve ever owned, and it’s totally good enough for the job.
Taken with an iPhone!
Here are the two keys: natural light, and contrast. Find a room with some windows in it, open the blinds, shoot during the day, and shoot against a backdrop that is of a contrasting shade or color to your item. Never use flash! Don’t use artificial light unless you have no other option (or unless you know what you’re doing as a photographer).
Photos a little too dark? Mine often are, as I live in Seattle. Fix this with software. I use Picasa, it’s lightning fast for adding light to a whole folder of photos and it’s free.
Crop your photos, especially the gallery photo, so that the thumbnail reveals the item fully to someone browsing a paginated eBay search. Or better yet, shoot your photos to fill the frame so you don’t have to crop!
There May Be No Need For Boilerplate
A lot of eBay store have a bunch of HTML that they add to the bottom of every listing that they make, detailing their return policy, shipping info, maybe a phone number or other store info, etc. I am an individual, not a store, and I don’t use any of this HTML. I’ve always loved the simple digital flea market aspect of eBay, and I think adding two whole pages worth of boilerplate disclaimers and other nonsense detracts from the experience. Also, does anyone really read that ugly crap?
Really, is all this necessary?
Here’s the thing: eBay automatically handles the most important parts of that anyway. They have options for selecting an eBay-compliant return policy when you make your listings. They have shipping options. Detailed ones, most of which the custom can see without you typing them redundantly in the description field. eBay even has a bulk listing description text editor. I use it when I go on vacation, to add an away message. Guess what? People even ignore that. Buyers want to read your description, not your policies.
There are auction services like Inkfrog and Auctiva that offer tools to write listings on their third-party sites and add extra photos, decorations, visual themes, etc. These services had some utility before eBay improved their own listing writing page. It’s now very quick to put up an eBay listing, and the site will save your selections for future use. Also, the third party listing tools invariably look terrible and dated. And they’re not free.
Learn the Ropes of Shipping
You need to be willing to ship if you list on eBay (unless you’re listing cars or property of course). If you only offer your item for local pickup, just put it on Craigslist. Find a Facebook forum locally and sell it there. And for god’s sake don’t list an auction item as pickup only; you’ll get one bid at the asking price and then it’ll be awkward when they pick up your $2000 drum set in person and hand you $75.
Good shipping practice is basically as important as taking good photos. No one likes to pay for shipping, so keep your costs down in any way that you possibly can. As an individual, you can’t compete with the discounts that big box retailers get on their shipping. There is a steep learning curve to shipping, unfortunately. Here are some things to know to help with shipping.
First, never ever ever ever ever ever use eBay’s shipping calculator. I know it’s tempting, but it is a dumpster fire of an app that will cost you sales galore. Having customers contact you for a quote is not a solution, because no one wants to write you before they buy the item they want. Use flat rate shipping. Accept that you will sometimes lose some money on this. Get good at it, learn to estimate. It’s the best way, by miles.
You should know how to pack properly obviously, but you should also know how to cut a box down to size so you’re not paying extra for unneeded dimensional weight. Don’t use larger boxes than you need. Keep extras on hand, because buying cardboard is stupid.
You should know how to print labels online. This is easy and actually gets you a discount. Print from the eBay sold page, of from PayPal (protip: you can print a shipping label from PayPal even if there is no associated transaction. Go here). You need to own a shipping scale to print labels online.
You should know which shipping service is going to be cheapest for an item. This is often tricky to know before packing something up, so when I list I offer generic “economy shipping,” and figure it out later. The big three US services are:
USPS – 1st Class is wonderful for items under 14oz. Don’t use boxes if you can avoid it, use these. I keep a supply in several sizes at all times. Wrap non-breakable items in newspaper, put them in one of these envelopes, you’ve now added basically no weight to your item to ship it. 1st Class domestic mail will cost $2.60-4 to ship. Dirt cheap, people are happy to pay that.
USPS padded and unpadded flat rate envelopes are also very handy, and can fit quite a lot. Their small flat rate boxes are a good deal, but the medium and large ones don’t compare favorably to the other shipping companies. USPS does not seem to discern between business and home addresses.
FedEx – I’ve found FedEx to be the most lax about dimensional weight of items, which means I use them frequently to ship things like drum sets. For things that weigh more than a pound and won’t fit in a flat rate envelope, FedEx is generally the best choice. Print the label at home and you don’t have to stand in line at their location; just drop it off and make sure someone behind the counter sees it.
A FedEx account can save a few dollars but it’s about the same as printing labels online. FedEx charges more for home addresses than business ones. Get a buyer’s business address if possible.
UPS – they can sometimes be great for mid-sized and larger items, but UPS is generally my last choice. If you’re shipping a lot of large items, they’re worth comparing to FedEx.
70 pounds is the cutoff point for many shipping services before you have to hire their freight division instead of their standard one. I think they require drivers to be able to lift that much weight. So if you have a package that weighs more than that, split it up if at all possible. If you can’t, it will cost more and you won’t be able to print a label at home for it.
Don’t get discouraged by losing a few bucks here and there on shipping. It takes a lot of practice.
Shipping Internationally
You should know how to ship internationally. Don’t be daunted, eBay lets you fill out the customs form online so you don’t break your wrist filling out a triplicate form. For rare items like drum sets going to Europe where I don’t trust my home scale, I keep some customs forms from the post office around. USPS is almost always best for international shipping, by the way. It’s almost like UPS and FedEx are actively trying to discourage it.
Important: you must always give international packages to the post office (not to your postal delivery person at your home). And don’t forget to sign the customs form(s)!
The flat rate Priority Mail boxes are often great deals within the US, especially the padded flate rate envelope and small flat rate boxes. Not so internationally, unless you’re shipping tungsten. 1st Class International tops out at 4lb. It’s almost always the best deal if you meet that weight limit. Beyond that, it’s all Priority International. Shipping a snare drum to Europe will cost around $60-70. To Japan, $70-80. The drum sets I’ve shipped to the EU have cost around $200-300. Not impossible.
You are not required to play along with buyers’ requests to declare your $2000 item as a $30 gift. You can if you want to of course, but be aware that you can only buy insurance on what you declare. USPS insurance as of this writing tops out at $600 per package. Consider splitting packages up if you need to by more than that. Also, customs fees are really not that much generally.
I’ve shipped to South Africa, Afghanistan, Kenya, Russia, China (I hand wrote Chinese alphabet characters on that label, years ago), Japan, Australia, Colombia, Egypt, New Zealand, Israel and all over Europe. Shipping worldwide is worth the trouble for the much larger audience. You can always denote exception countries you will not ship to. Currently I don’t ship to Brazil; though I love the country its postal system is corrupt.
Be careful with larger packages going internationally. There is a dimensional limit that prohibits me from shipping bass drums larger than 22″, for instance. Look into it if you have something huge.
Buy It Now vs. Auction Style eBay Listings
In my eBay browsing, I see a ton of items listed as auctions, and with starting bid prices that are totally reasonable, fail to sell and get re-listed over and over again. I see the same or similar items from other sellers easily sell as buy it now listings. People are not patient. If they have the option to pay a bit more in order get their item in their hands, or just to know that no one else can outbid them and take it away, then that is usually the route they’ll take.
I make almost exclusively buy it now-style listings on eBay. I used to be much more adventurous and start most everything I sold at .99 with no reserve. Eventually I realized I was losing money doing that. Auctions sell for less in almost every case. The exception is if you have something truly rare with high demand. Something that is difficult to put a price on, even.
This seller just paid money to get rid of their drum
Timing Isn’t Everything But It’s Something
Much is made by some people of posting at the right time of day. Sundays seem to be a large posting day, for obvious reasons. I don’t generally think that the time you put a listing up is all that important. If you have something to sell that there is significant demand for, and you make it properly visible with the other tips I outline in this article, people will find it.
Auction style listings are another matter. Don’t let your auctions end in the middle of the night. Many, many times, most of the bidding on an item will come in the last 30 seconds before the auction ends. If you’re on the east coast, keep in mind that 9am for you is 6am for the west coast and so you’re likely losing out on a significant number of bidders who won’t be awake yet.
And if your listing ends on Sunday, many people will have the day off. Of course these days that might mean they’re actually less likely to be in front of a computer than if the listing ended at 2pm on Tuesday.
eBay now offers listing scheduling for free, so there’s no excuse for not starting and ending your auctions at a reasonable time.
eBay’s listing scheduling option
Consider spreading out a bunch of listings if you’re scheduling many at once. Put ten minutes between each one to maximize visibility.
Don’t Deceive
This should be obvious, but if your item has flaws own them in the description. In detail, in text and in photos. If you don’t, things will be returned, costing you time and money and possibly bad feedback. It’s not worth it.
And price accordingly. Many flawed items will sell faster than the perfect ones, because people don’t mind some scratches and dents if they can save a few bucks.
Macro or large pictures taken in good light can be the best possible description
Don’t Be Adversarial Toward Potential Customers
Speaking of boilerplate, one thing I occasionally see is sellers writing disclaimers in their item descriptions in such a way that they sound like the buyer is the enemy, or they sound like they’re expecting to be screwed over or scammed by whoever buys their item. Don’t do this. Be friendly and positive in your policy write-ups.
There are systems in place through both eBay and PayPal to mitigate scams, chargebacks, etc. Despite some loud complaining by people who have been bit in the past, there are few problems with this type of thing (it does depend on the section of the site). A good idea is to block buyers/bidders with less than a couple feedback points. But beyond that, I generally trust people and do not have problems.
This is not to say don’t be cautious. I recently sold an expensive drum set to a buyer in Finland. In a situation like that I always want to touch base with the buyer before shipping the item out, so I can get a sense of whether they’re legit or not. This buyer did not return my emails, which made me nervous. I considered refunding his money and canceling the sale, for fear of a chargeback scam.
So I went online and asked some other drum guys who I respected for their opinion. By chance another drummer in Finland in the forum knew the buyer, and was able to put me in touch (it turned out he had been away skiing all weekend). And it all turned out fine, he got his drums and I got my money.
Volume Is Self-Reinforcing
This is a powerful one but not everybody can take advantage of it. New items you list will lend visibility to your older items. Every item in your store (or non-store eBay account) will help all the others sell. So if you have 100 items up, each one is far more visible than if you have 10. Particularly if they’re all in the same top-level category and/or subcategories. It’s like free advertising. This is also, obviously, a great way to gain followers on eBay and get repeat business. Consistently list the same types of items in quantity.
I used to not view an item as worth listing if it was worth less than $15. But now I recognize that each little item is worth putting up if only to get clicks on my others. eBay automatically puts a link to your other items at the bottom of your listings (another good reason to not bother with boilerplate HTML in your listings). In weeks where I list more, I sell more. But not necessarily the things I list that week.
I hope you’ve found this article helpful! If so, please feel free to drop me a line through the contact form on the right. I’d love to hear from you!
Hey, this is pretty cool, The B’shnorkestra has been nominated this year for an Earshot Golden Ear award for our record Global Concertos. It’s a live recording that I thought came out really beautifully, and I’m proud to have played on it.
For my recent session for Whitney Lyman at London Bridge.
I ended up using all of these except the old Ajaha hats in the middle. We switched cymbals and snare drums and even floor toms quite a bit between songs, which I always enjoy doing. I used a Rogers Super Ten that I had just received (sold it a few days after the session), a Gretsch 4157, and a house DW 7×14.
Oh, and they had sleigh bells, which I couldn’t resist putting on a track.